

English
Create/Modify/Regenerate an API key
You can always refer to the eZmax API documentation for more details: API documentation eZmax
Create an API key
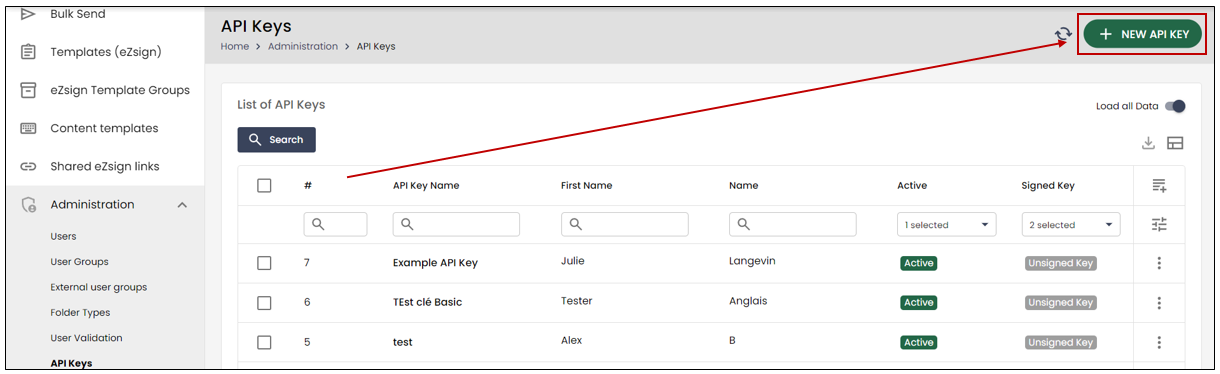
From the Administration menu >> Select API Keys.
- Click on the New API Key button.
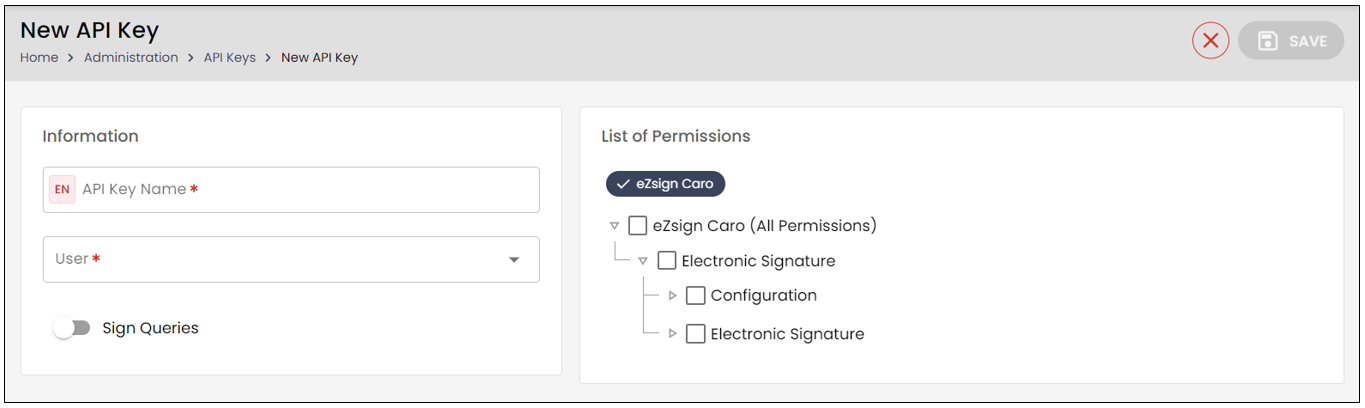
Enter the API Key Name.
The API key must be associated with a User. This user can be selected from the drop-down list. If you want to create signature folders via the API key, make sure that the required eZsign access is enabled for this user.
You have the option to Sign Queries for the key. By default, this option will be disabled. Signing queries on an API key means adding a digital signature to API requests to ensure their authenticity and integrity. This signature allows the server to verify that the request has not been altered and that it comes from a legitimate source.
NOTE: The integration used must support signed requests. For example, the commercial automation platforms we are currently integrated with, such as Salesforce and Power Automate, do not support signed requests. Please note that the majority of our SDKs support signed requests.
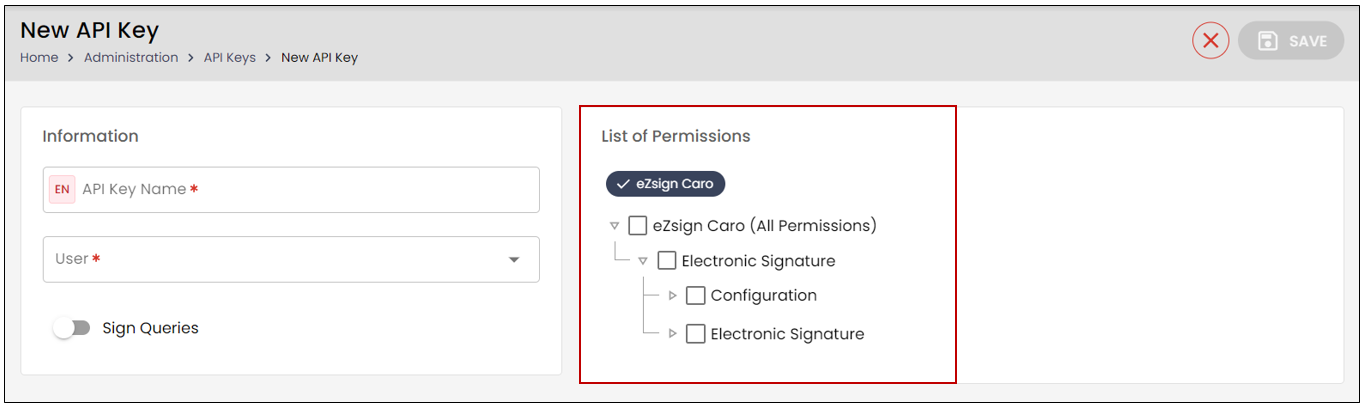
You can assign Permissions to the API key. We highly recommend applying the "least privilege" principle when assigning permissions to the API key. Each API key should have the minimum necessary permissions to perform the required actions and should not have any additional authorizations.
When finished, click on Save , and eZsign will automatically generate the key.
Warning
Make sure to copy the key into the appropriate field, as for security reasons, it will no longer be accessible after closing the popup.
- Save the generated API key and keep it in a secure location. Always handle it securely to prevent any unauthorized access.
Add a CORS on an API Key
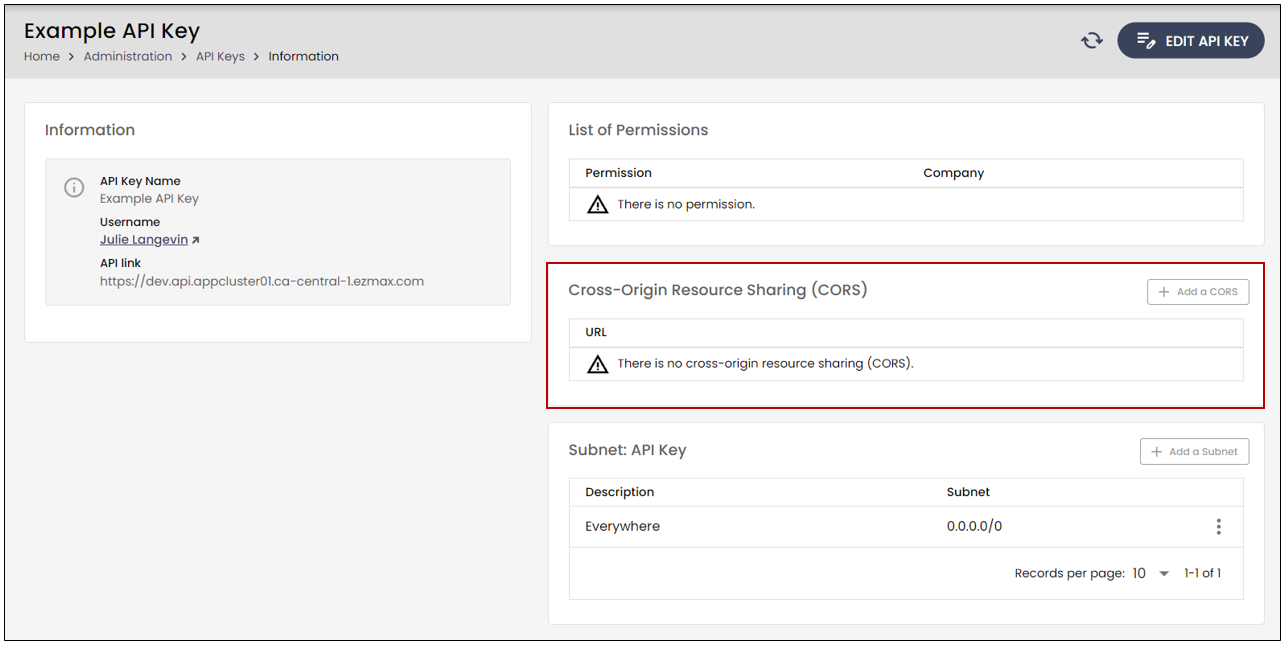
Once the key is created, you will be able to add a CORS (Cross-Origin Resource Sharing) by clicking on the +Add a CORS button. A CORS would be necessary in the case of integrating one website with another website. There are complex technical specifics related to CORS, which is why we recommend contacting us before adding one.
Add a Subnet to an API Key
You can also add a subnet to the API key by clicking on the +Add a Subnet button.
This will allow you to restrict access to the API so that only requests from a specific range of IP addresses can use the key. This practice enhances security by ensuring that only systems within the specified subnet can access the API.
Modify an API Key
From the Administration menu >> Select API Keys.
To modify an existing API key, select it from the List of API Keys and click on Edit API Key.
You will be able to change the name of the key, its permissions, and enable or disable queries signing. You can also deactivate it.
NOTE: You will not be able to modify the user associated with the key. If you want to change it, you will need to deactivate the key and create a new one.
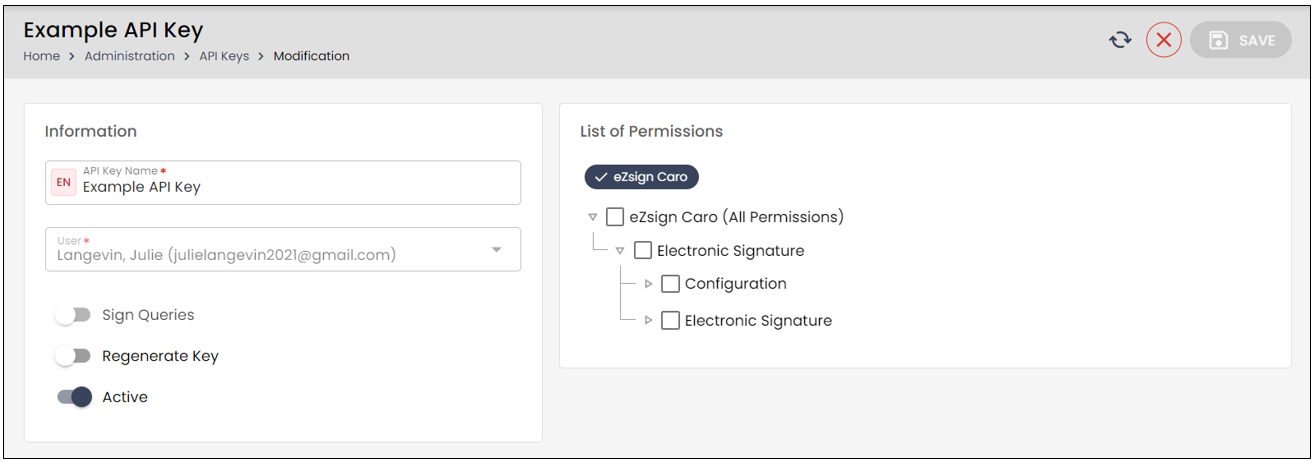
- Make the desired changes and click on Save to record them.
Regenerate an API Key
To regenerate an existing API key, select it from the List of API Keys and click on Edit API Key.
You can regenerate the key by toggling the Regenerate Key option. By clicking on Save , a new key will be generated.
Warning
When you regenerate an active key, the previous key will be invalidated, and all integrations using the previous key will no longer function.