
English
Types of Form Fields (eZsign Web)
This article describes each of the available form field types.
For each field type, the setting options will vary, but some settings are fixed and have been grouped in the first section of this article. When you click on a field, the setting options for that field will appear on the right side of your window.
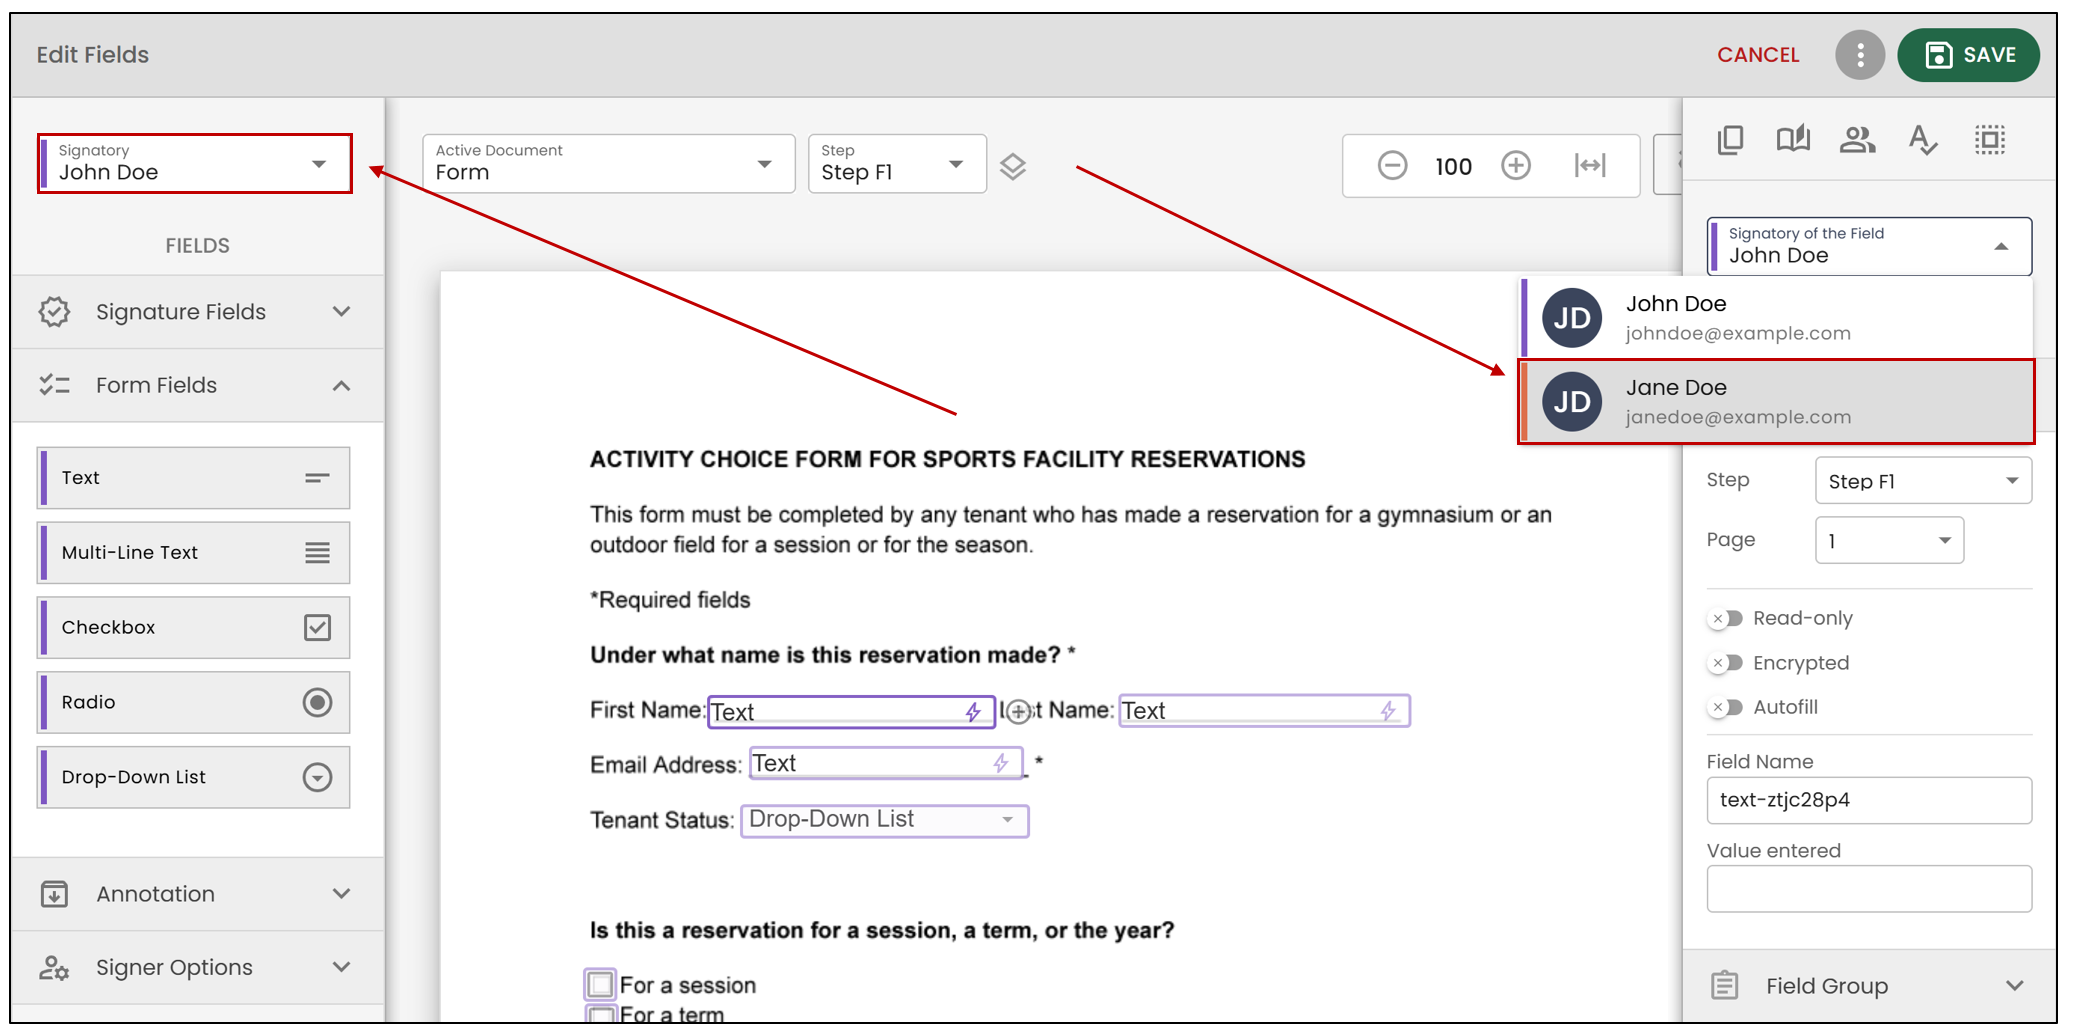
You will always need to assign the field to a signer when adding the field, but you can modify the signer of a field at any time.
You have access to the following tools to speed up the addition of form fields:
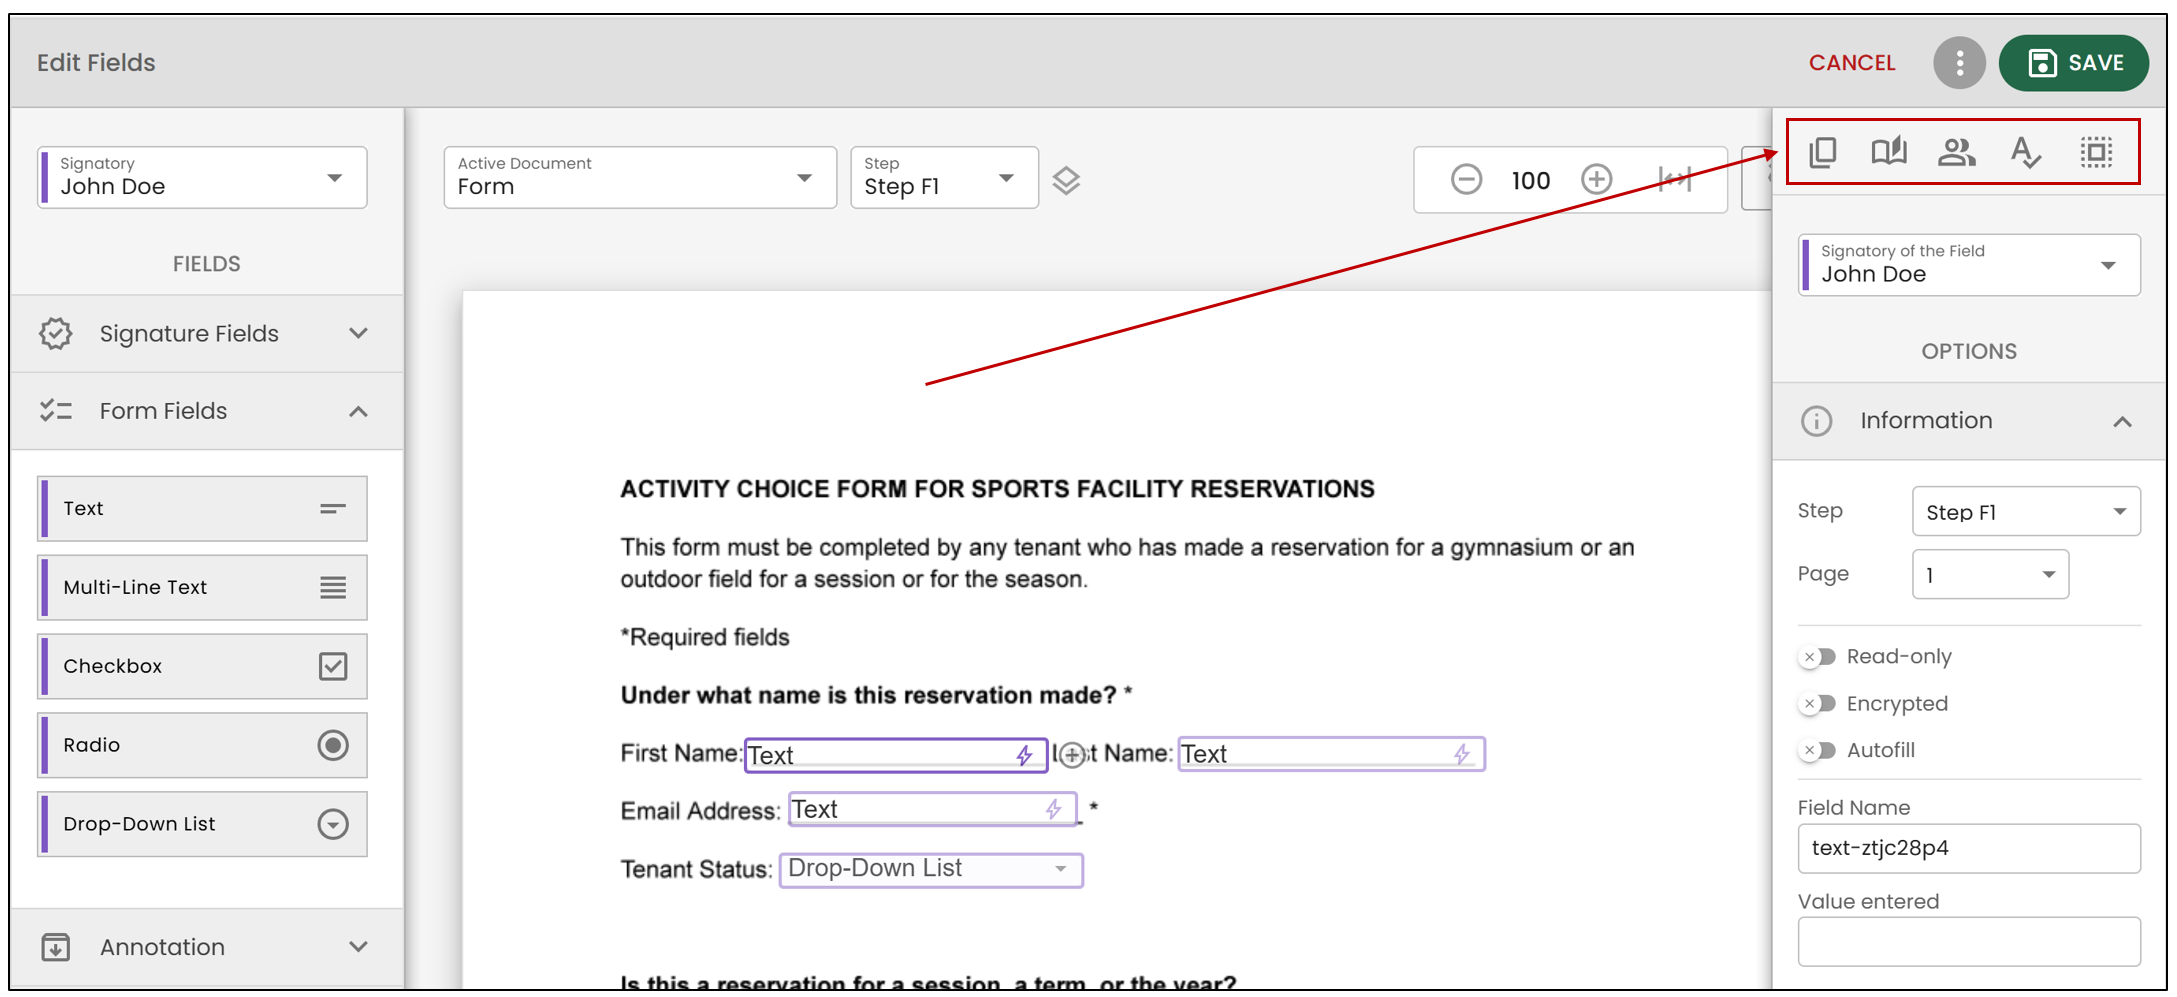
Copying an element:
- When you select a field in your form, you have the option to click on the

icon. This allows you to copy the selected field while retaining the previously entered settings. This creates a duplicate field, but in a separate field group, meaning they will not be linked.
Copying across multiple pages:
- To copy a field to other pages, click on the

icon. You will then need to enter the page numbers where you want to duplicate the element. This option copies the field to the selected pages while maintaining its position and settings.
Copying for each signer:
- By selecting the

icon, you can duplicate the element for every signer who has access to the document. For example, if the form has eight signers, you will now have eight copies of this field.
Copying by keyword:
- If you select the

icon, the field will be duplicated on all pages where the specified keyword appears. Make sure to select the desired pages.
Selecting Fields for the Current Signer:
- By clicking the

icon, all fields assigned to the current signer will be selected.
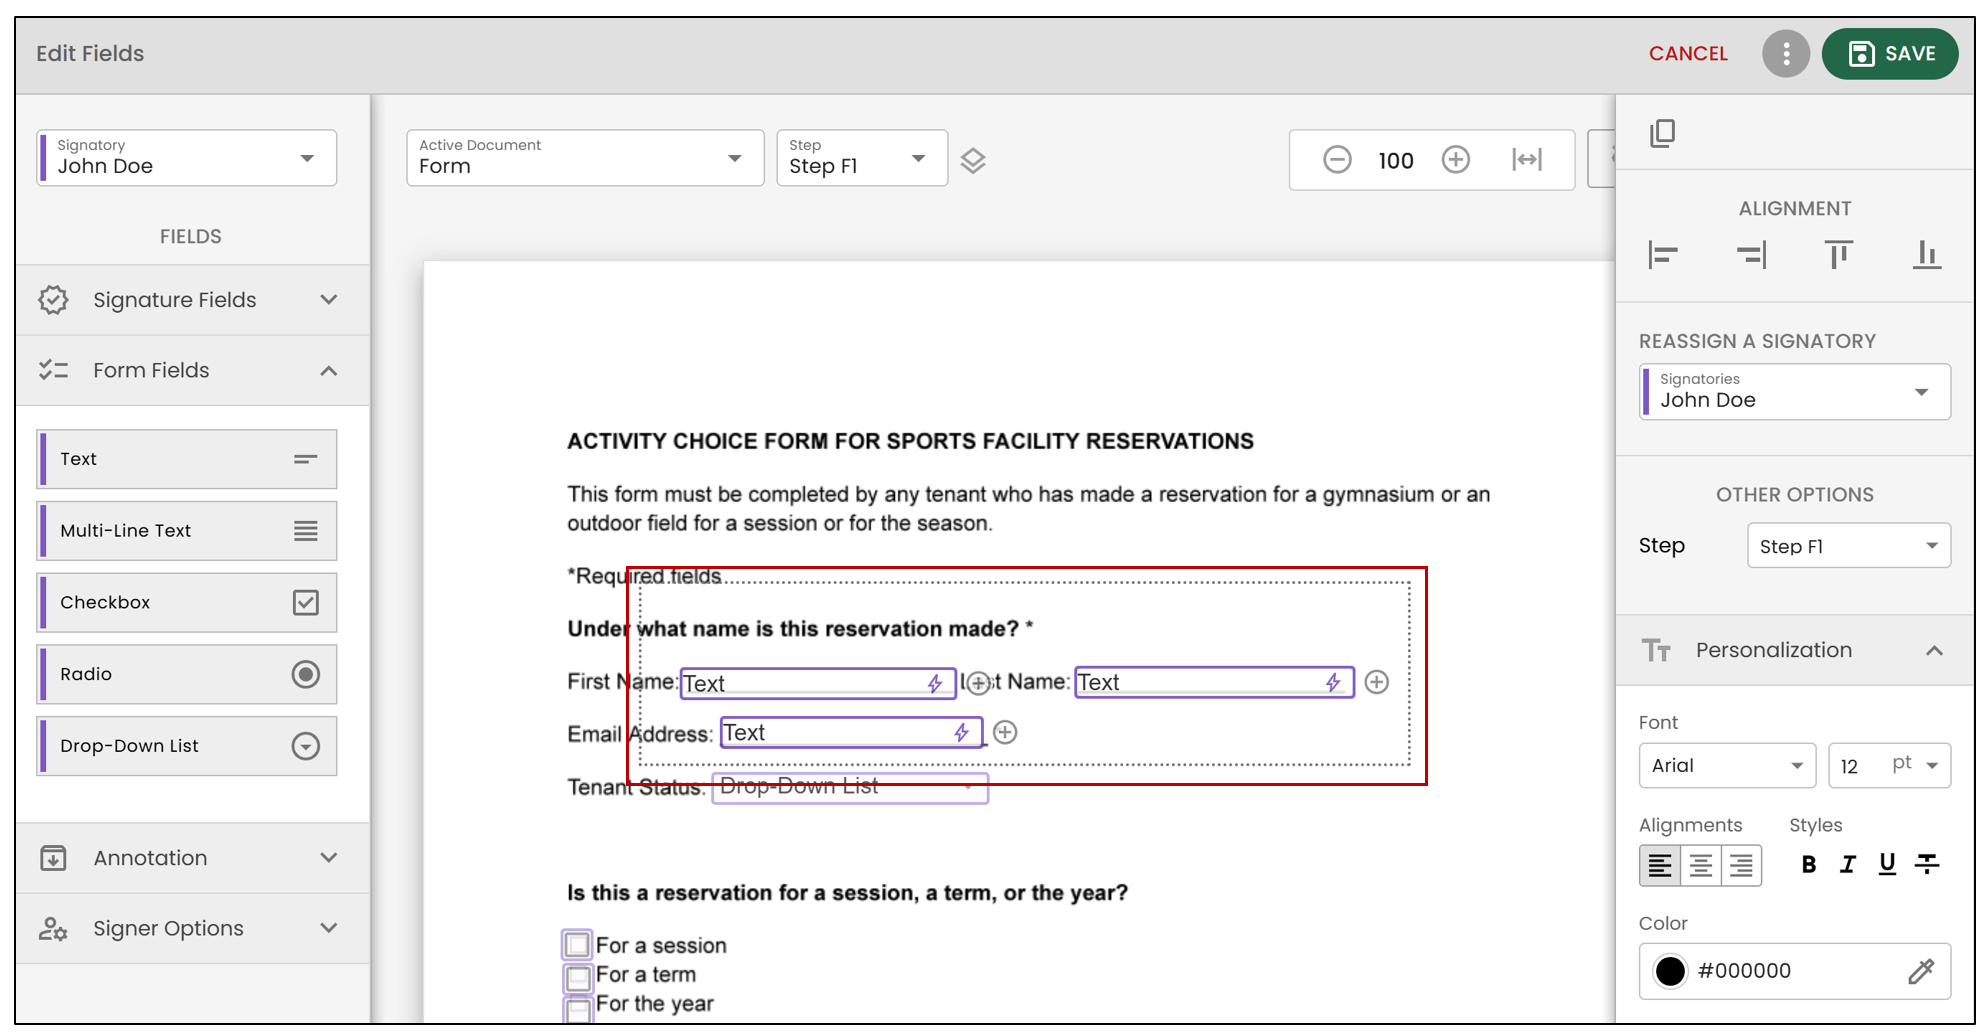
Performing Actions on Multiple Fields Simultaneously:
- To select multiple fields at once, click where you want to start the selection, hold down the left mouse button, and drag the cursor to include all desired fields.
Creating a Copy of a Field:
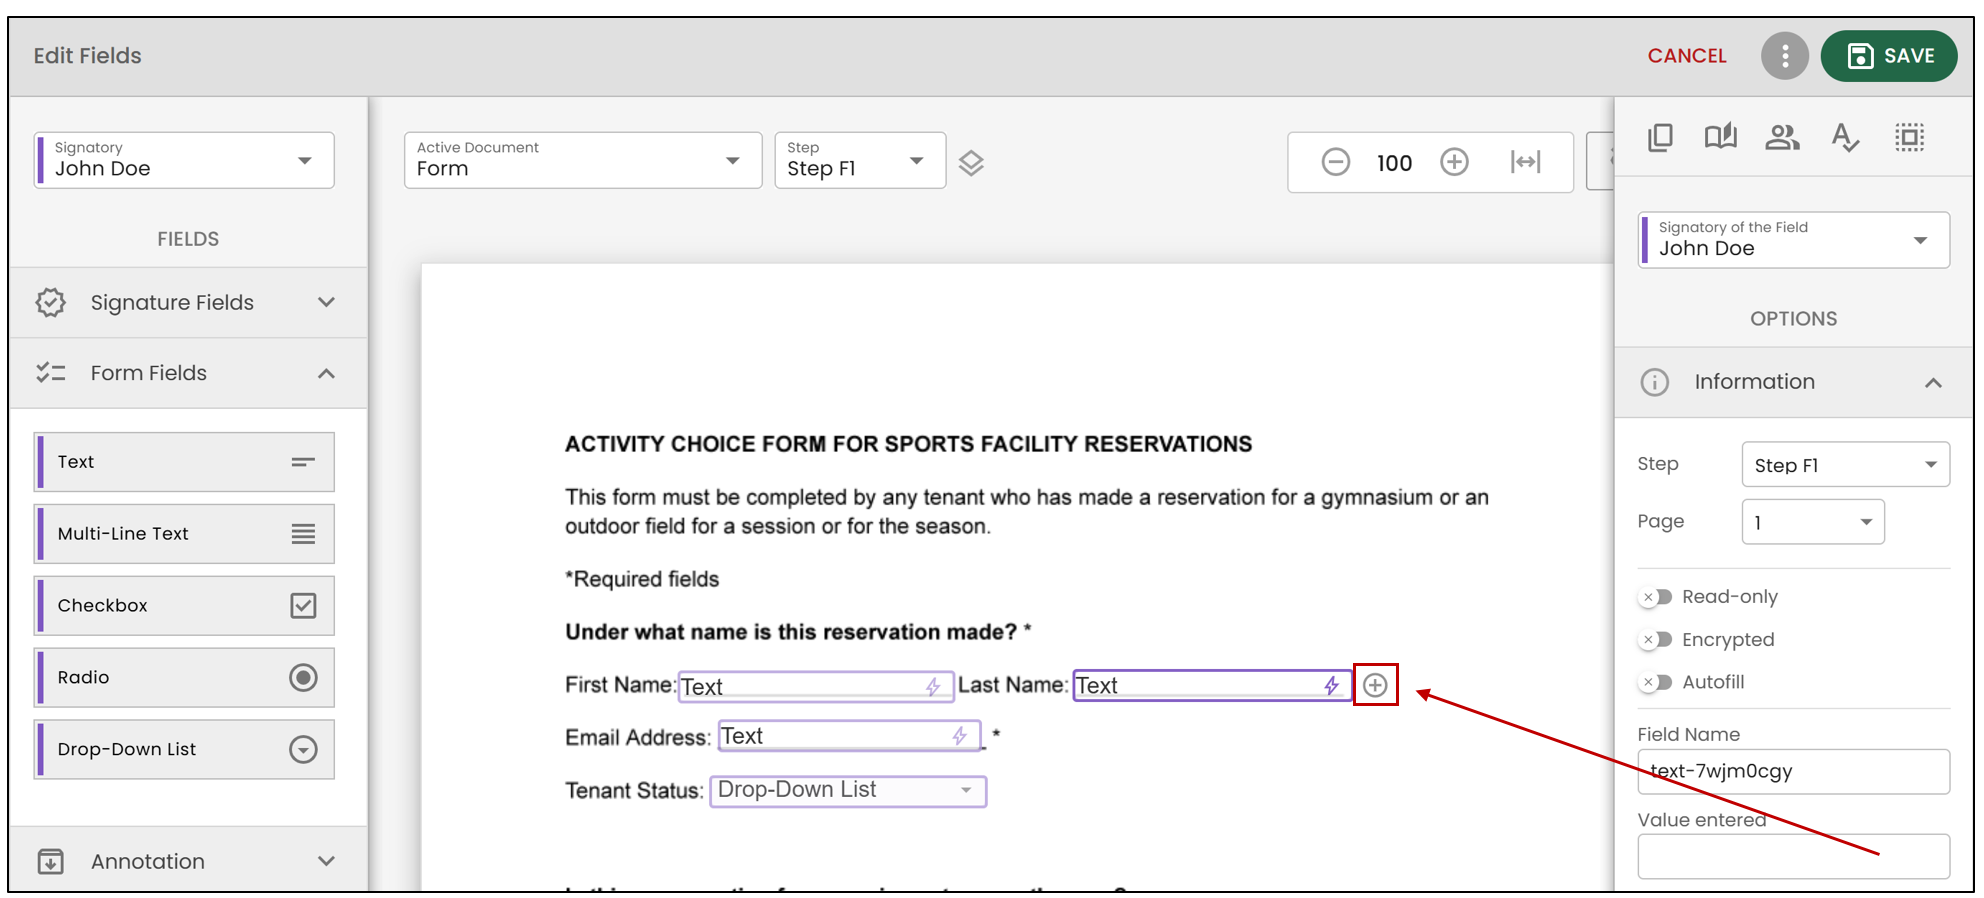
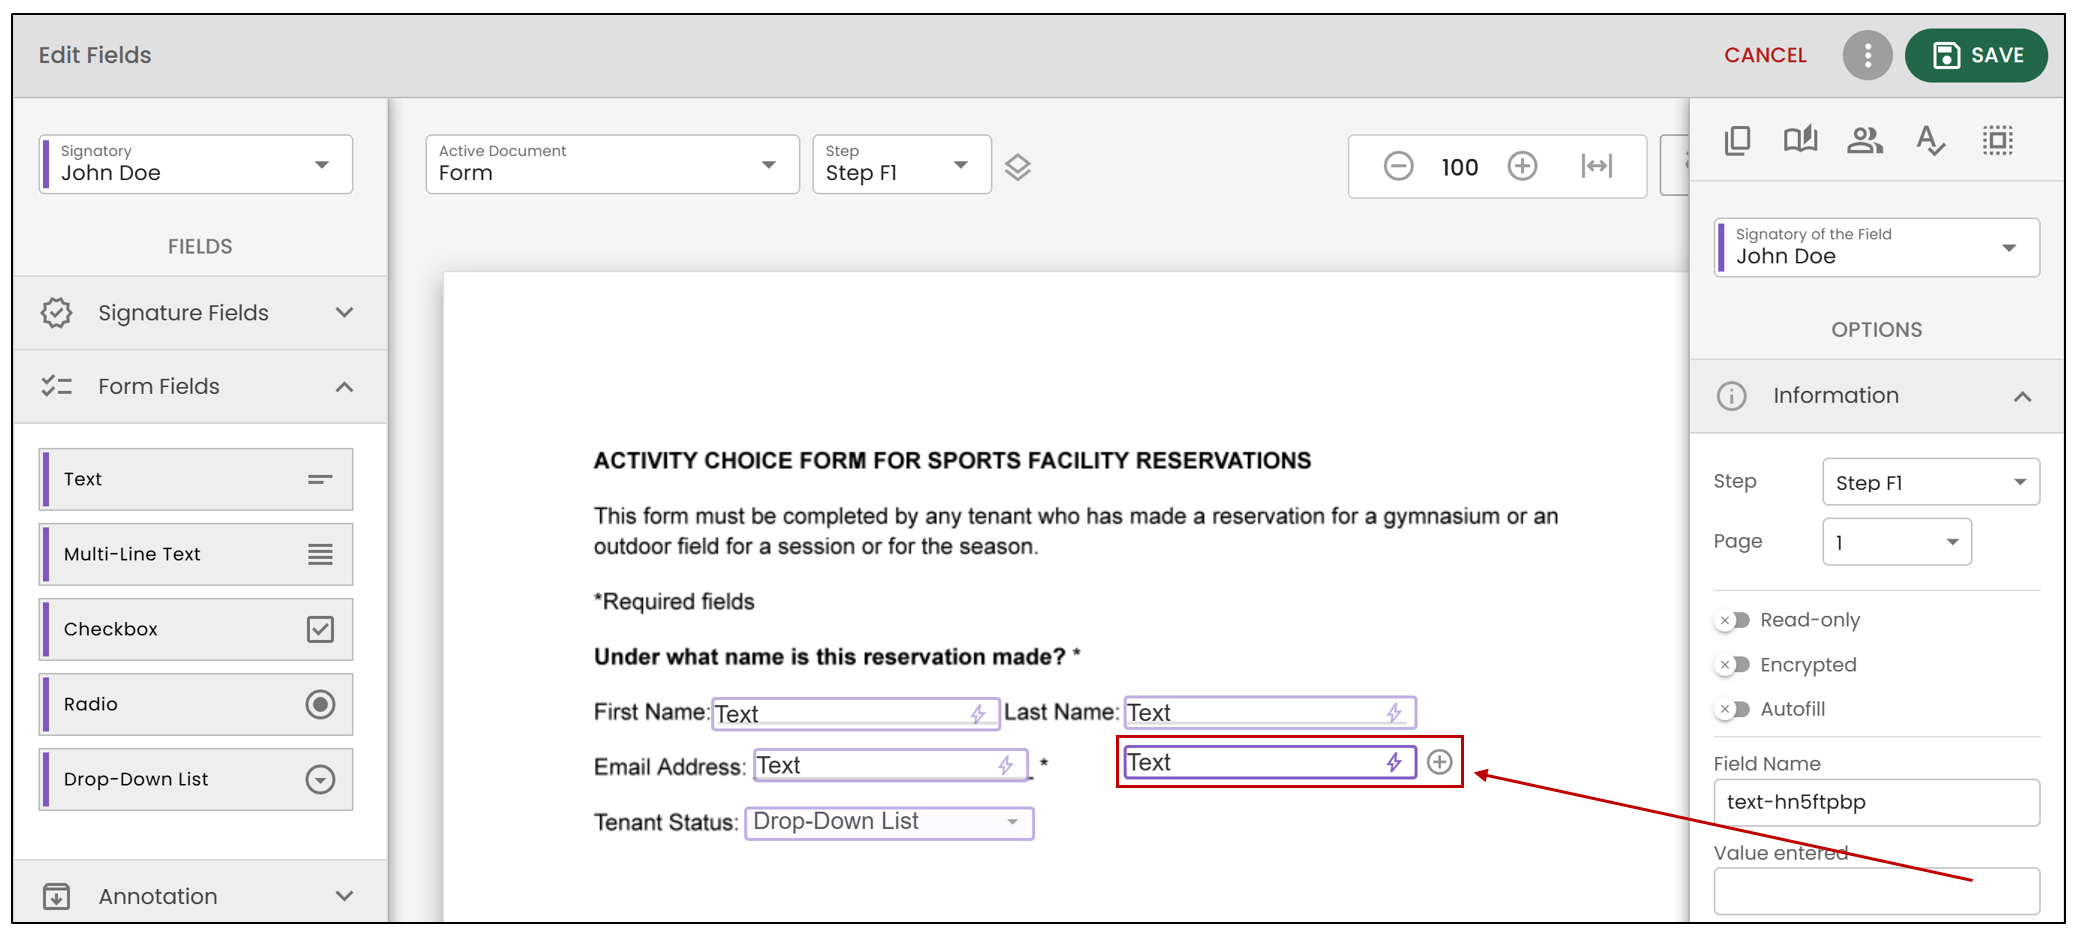
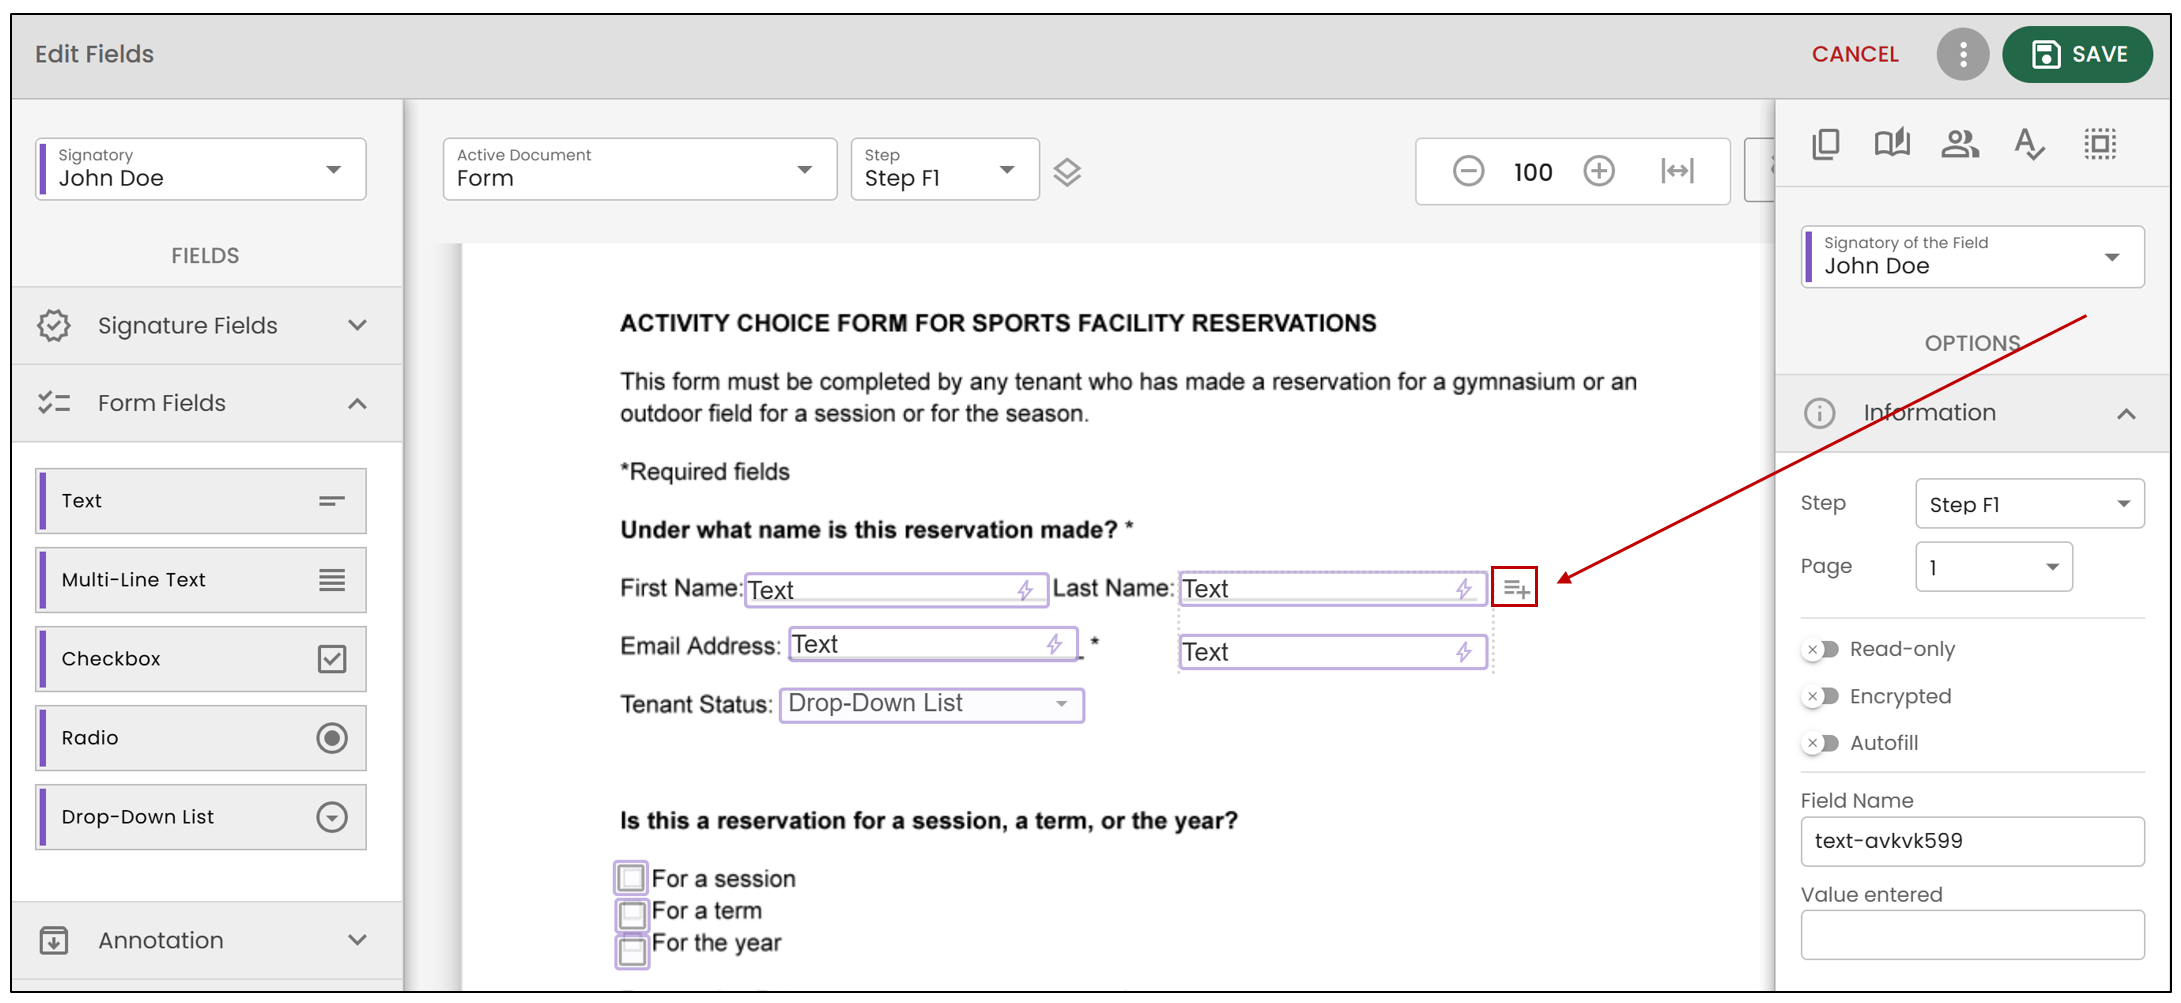
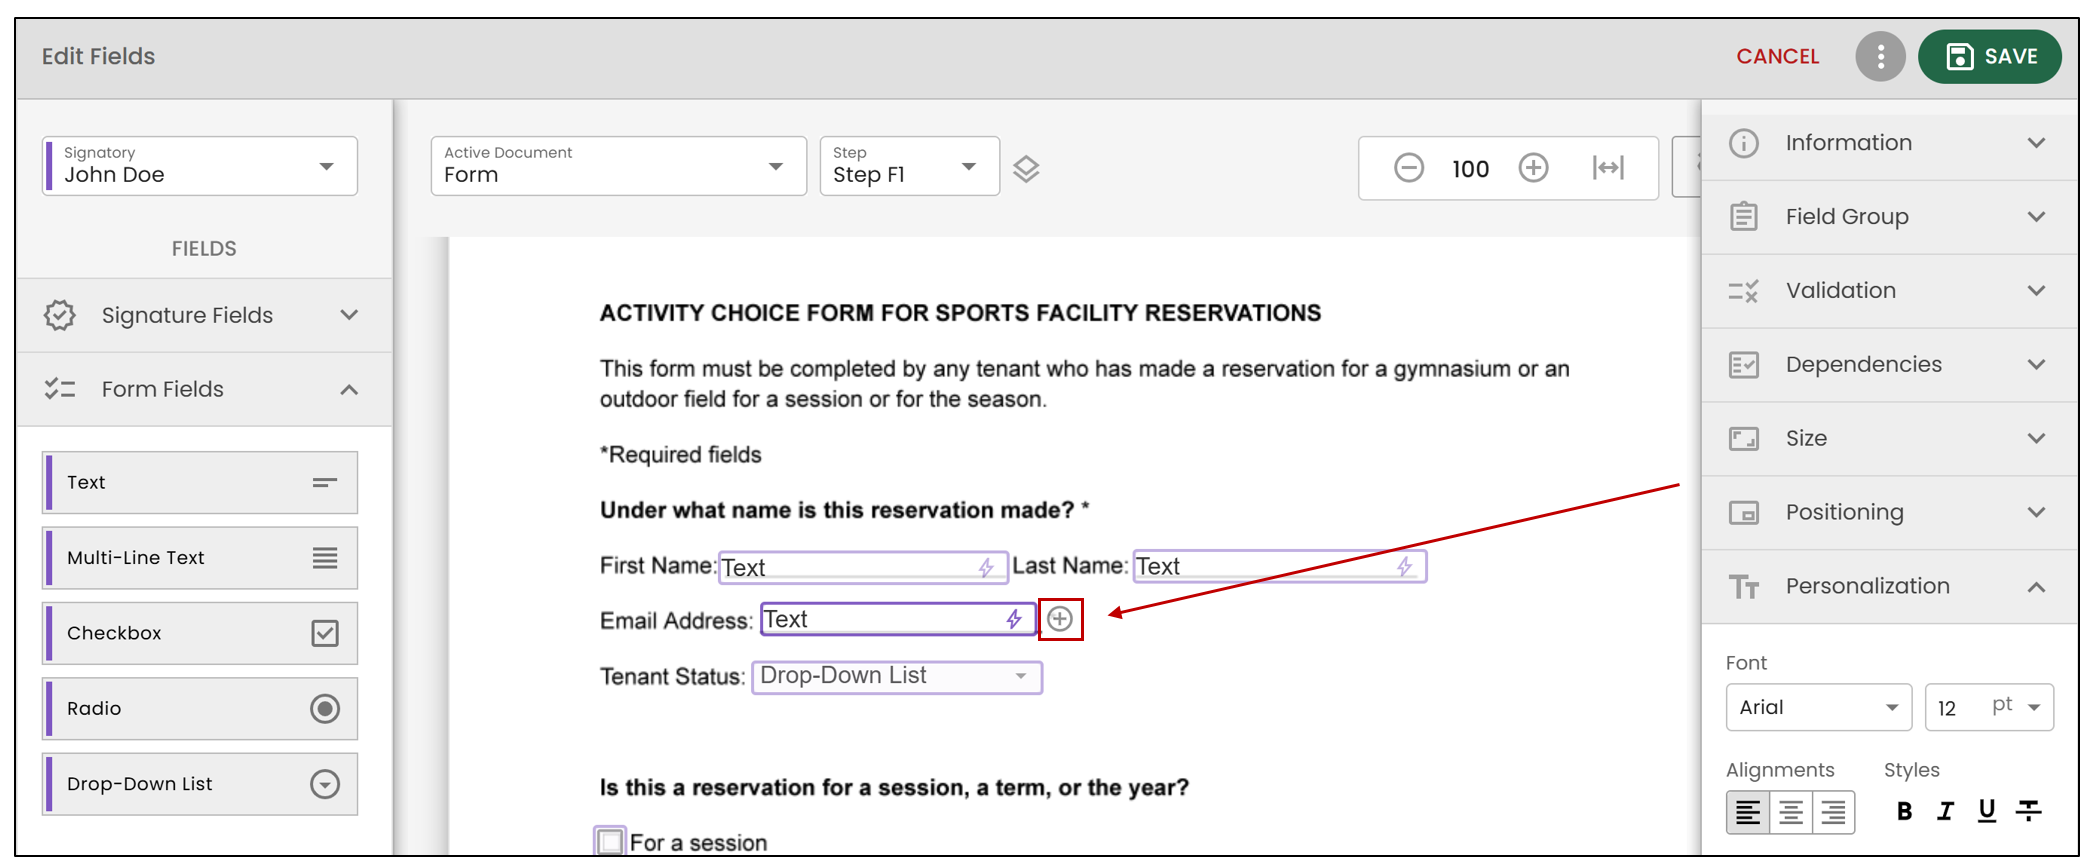
- By pressing the "+" button located to the right of a form field, you can create a duplicate field without adding it to a field group. This means it will be treated as an individual field.
Fixed Parameters
Informations
Step**😗* Indicates the order in which the signature must be placed. For more information, see the article Order in Which Signatories Will Sign.
Page**😗* Specifies the page of the document where the field will be added.
Read-Only : Add a Value entered. This field will be visible to anyone viewing the document but cannot be modified.
Field Name : Specifies the unique name of this field.
Field Group
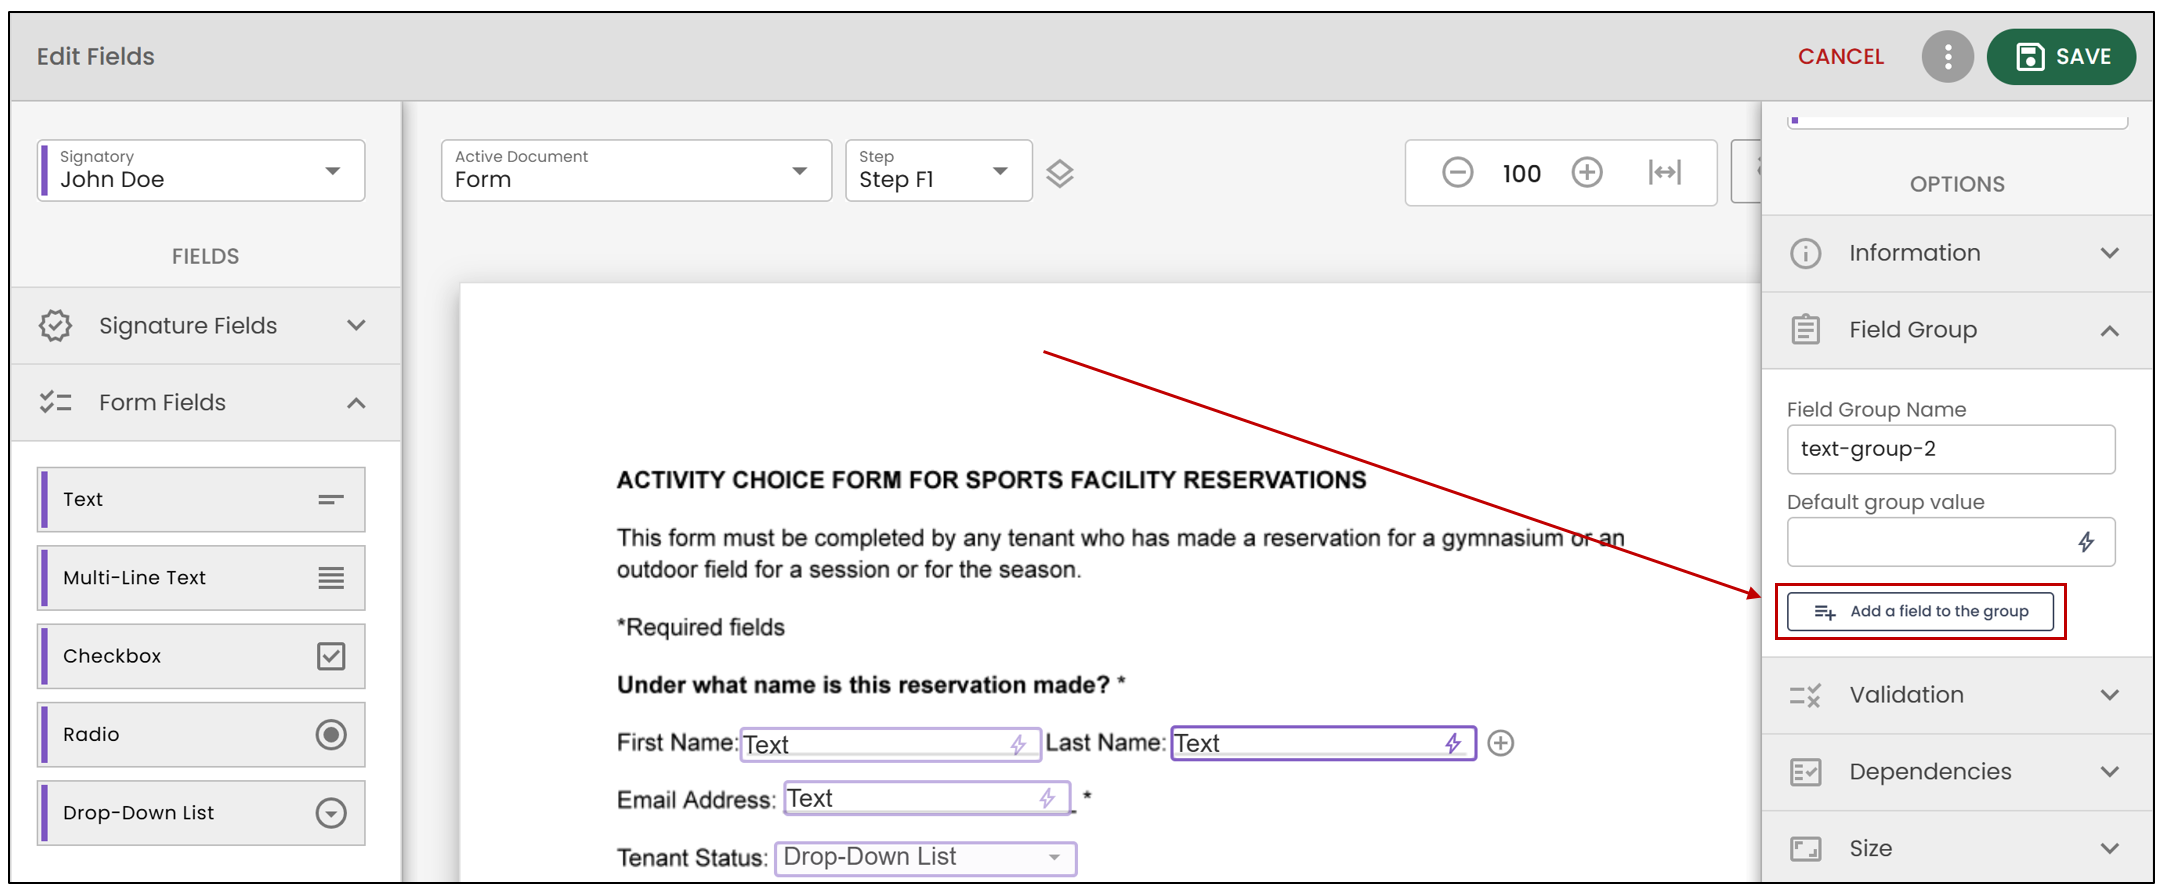
With the new eZsign feature, you can now modify form field groups in a dedicated section.
- If you want to create a field group, select the desired field, then click Add a field to the group in the Field Group section.
- A field will then be added to the Field Group.
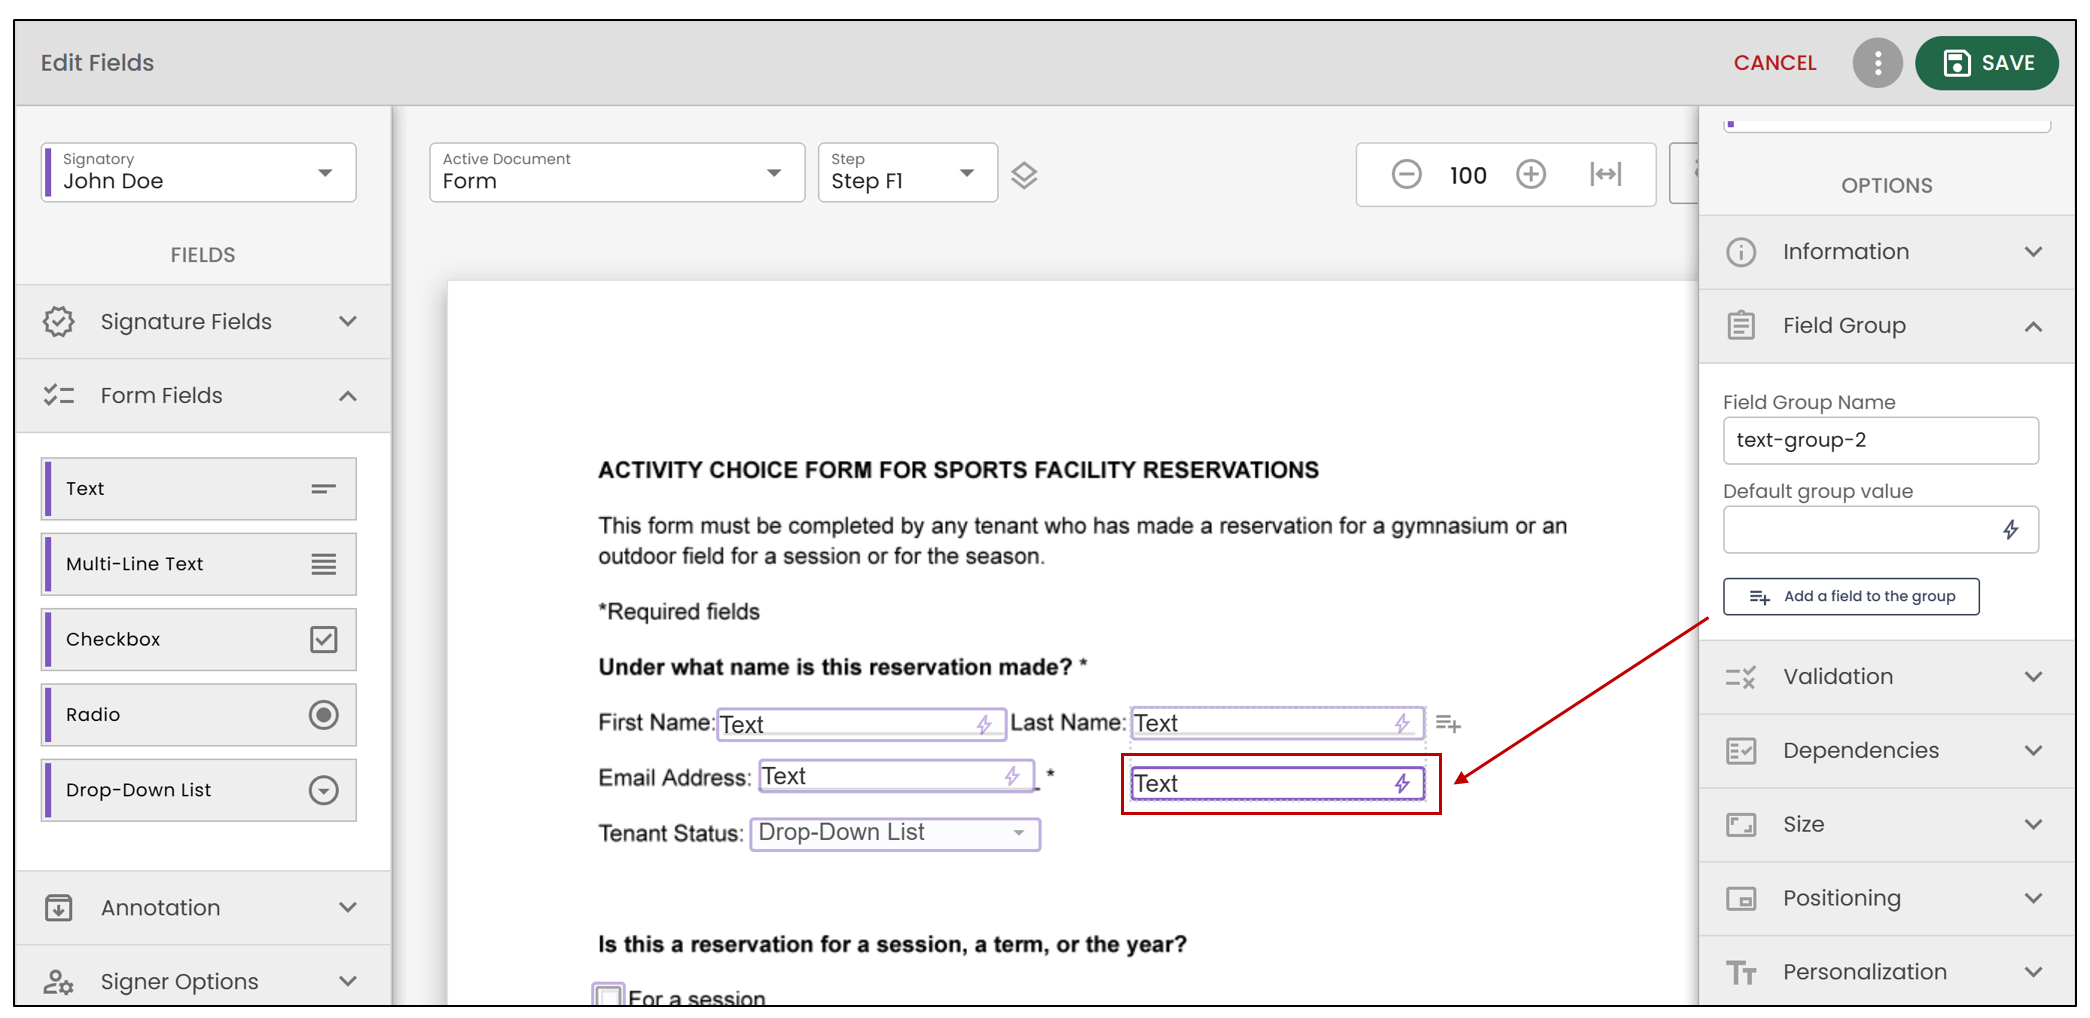
- If you want to add more elements to this field group, click on the

icon.
Validation
Validation of an Individual Field
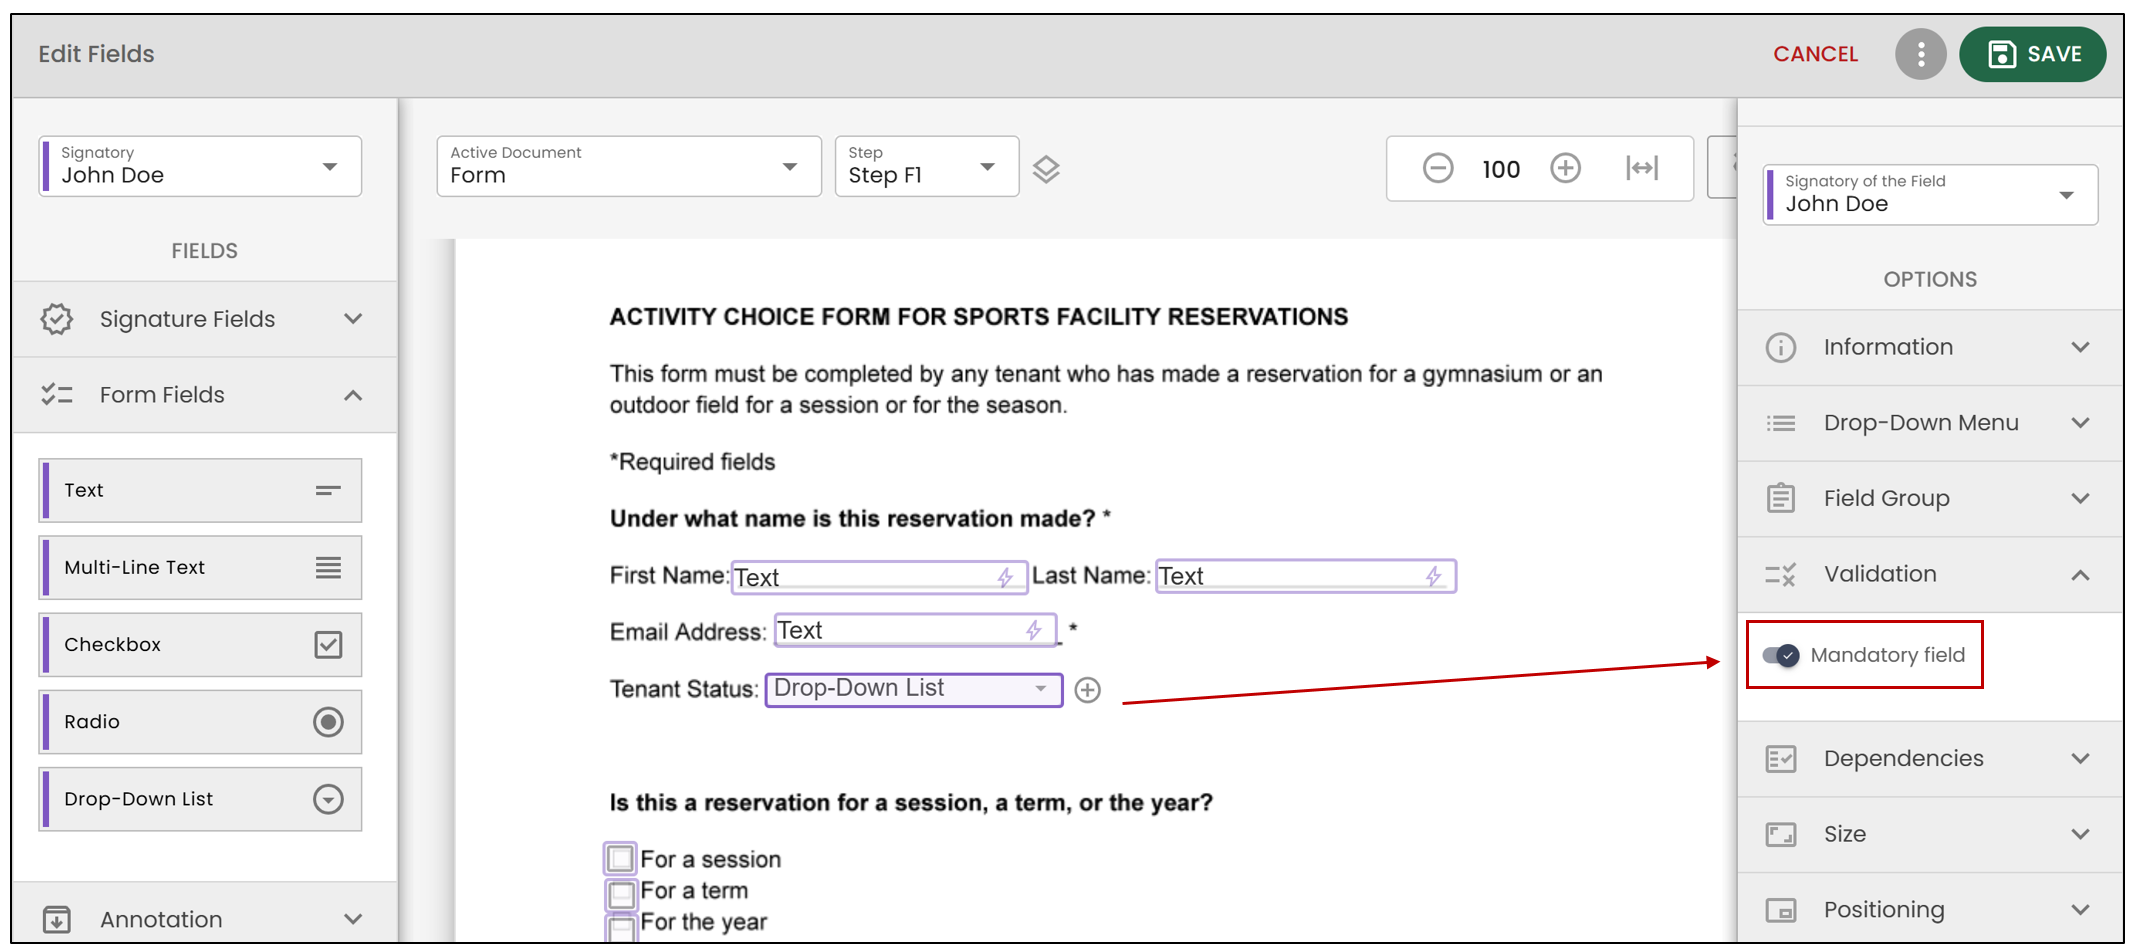
By enabling the Mandatory field option, you can make a field mandatory for signing. The available options will vary depending on the field type.
Validation of a Field Group
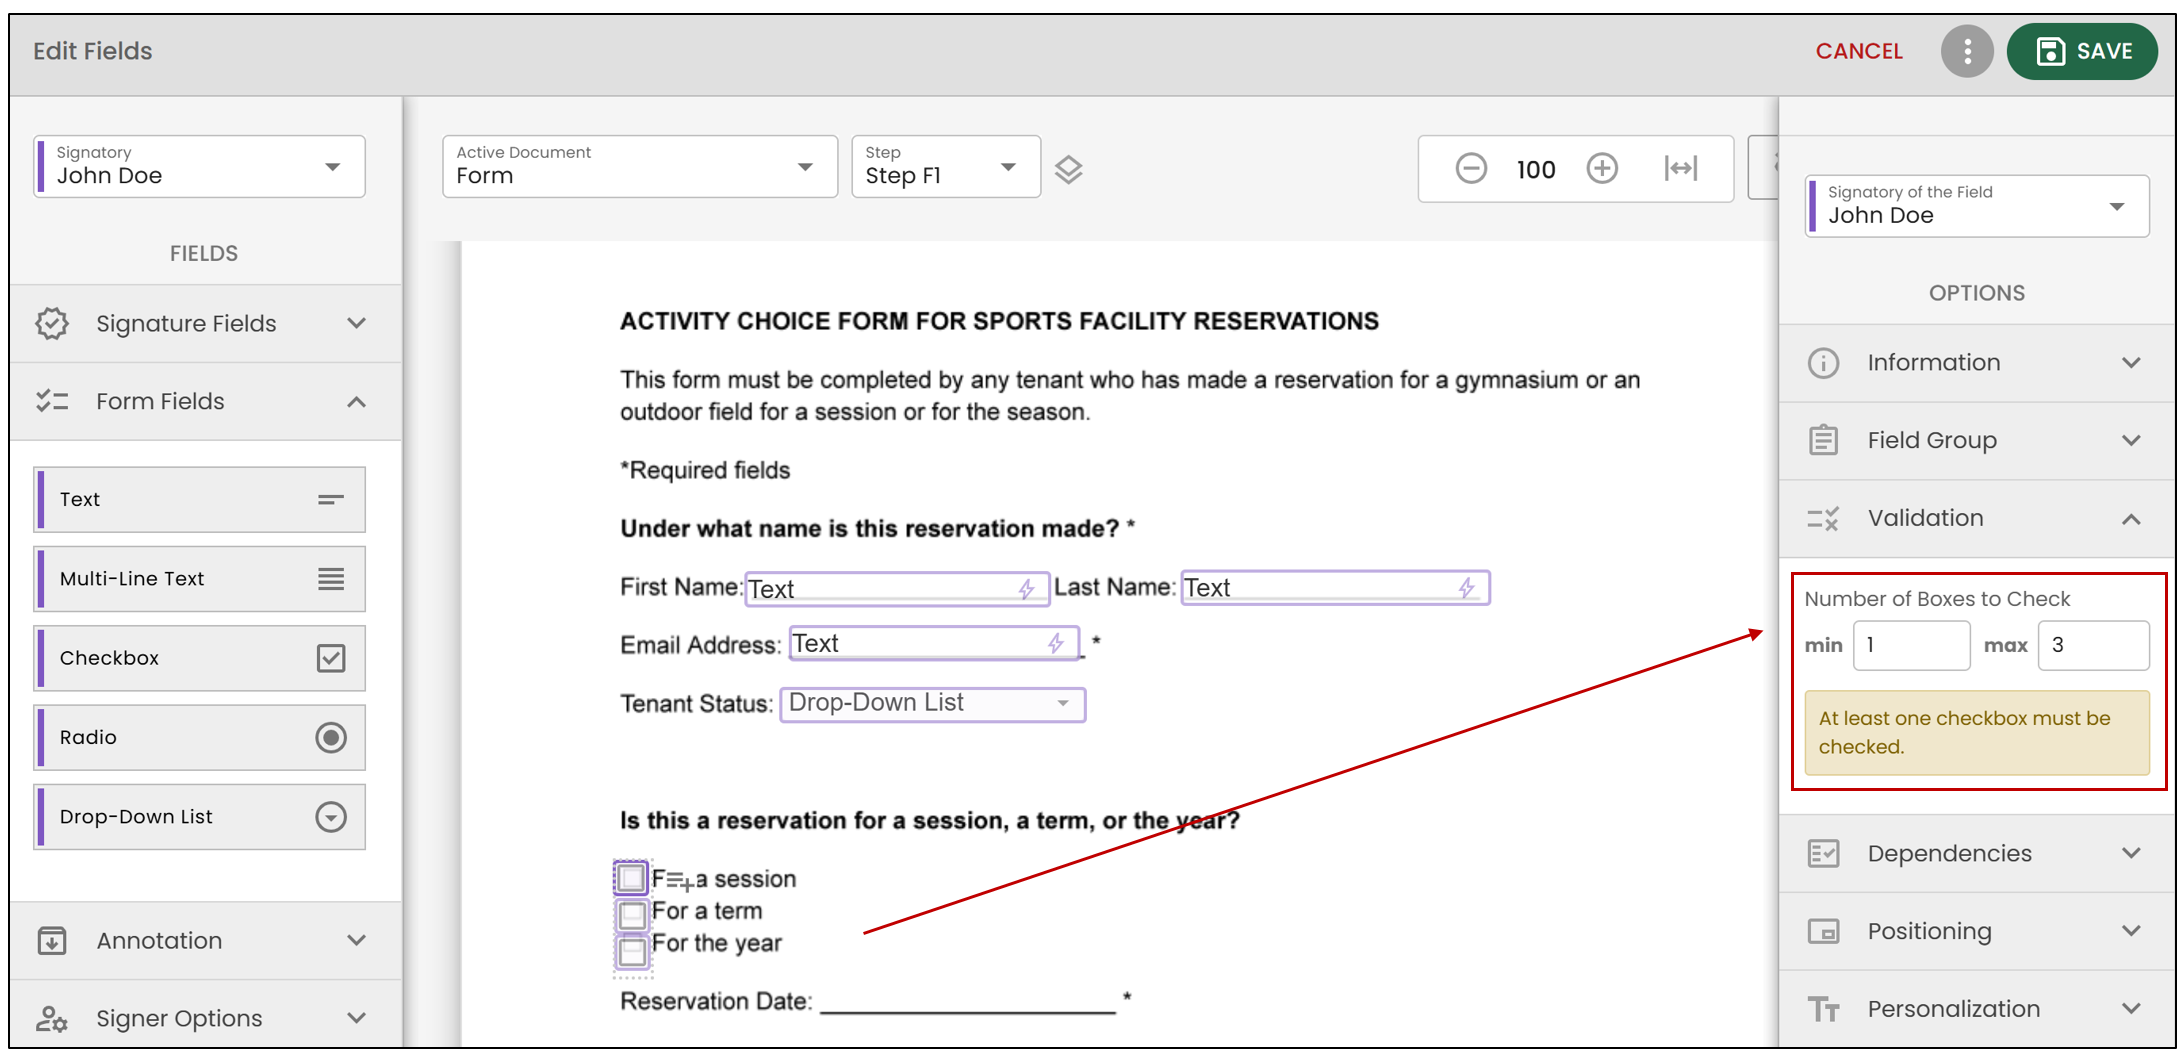
When validating a field group, you will need to specify the number of fields that must be completed.
Dependencies
Detailed article coming soon.
Size
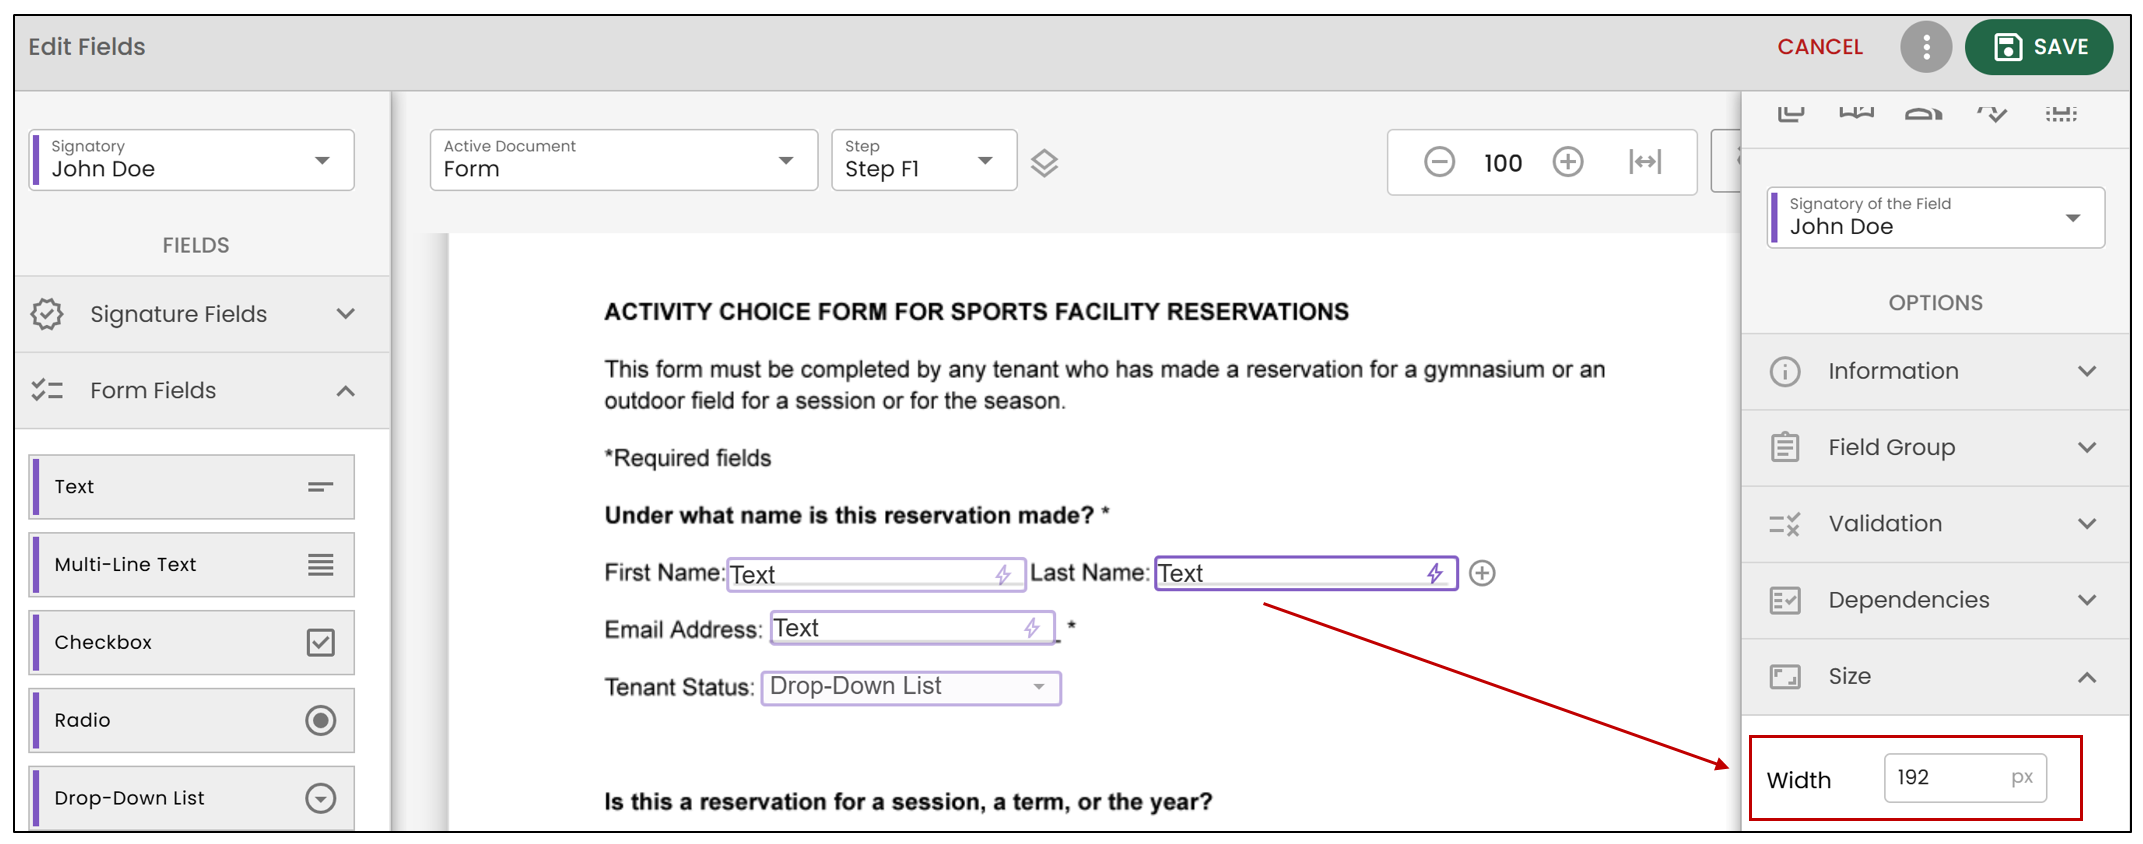
Choose the field Width.
Positioning
- By X and Y : Allows you to move the field left or right by adjusting the X value or up and down by adjusting the Y value.
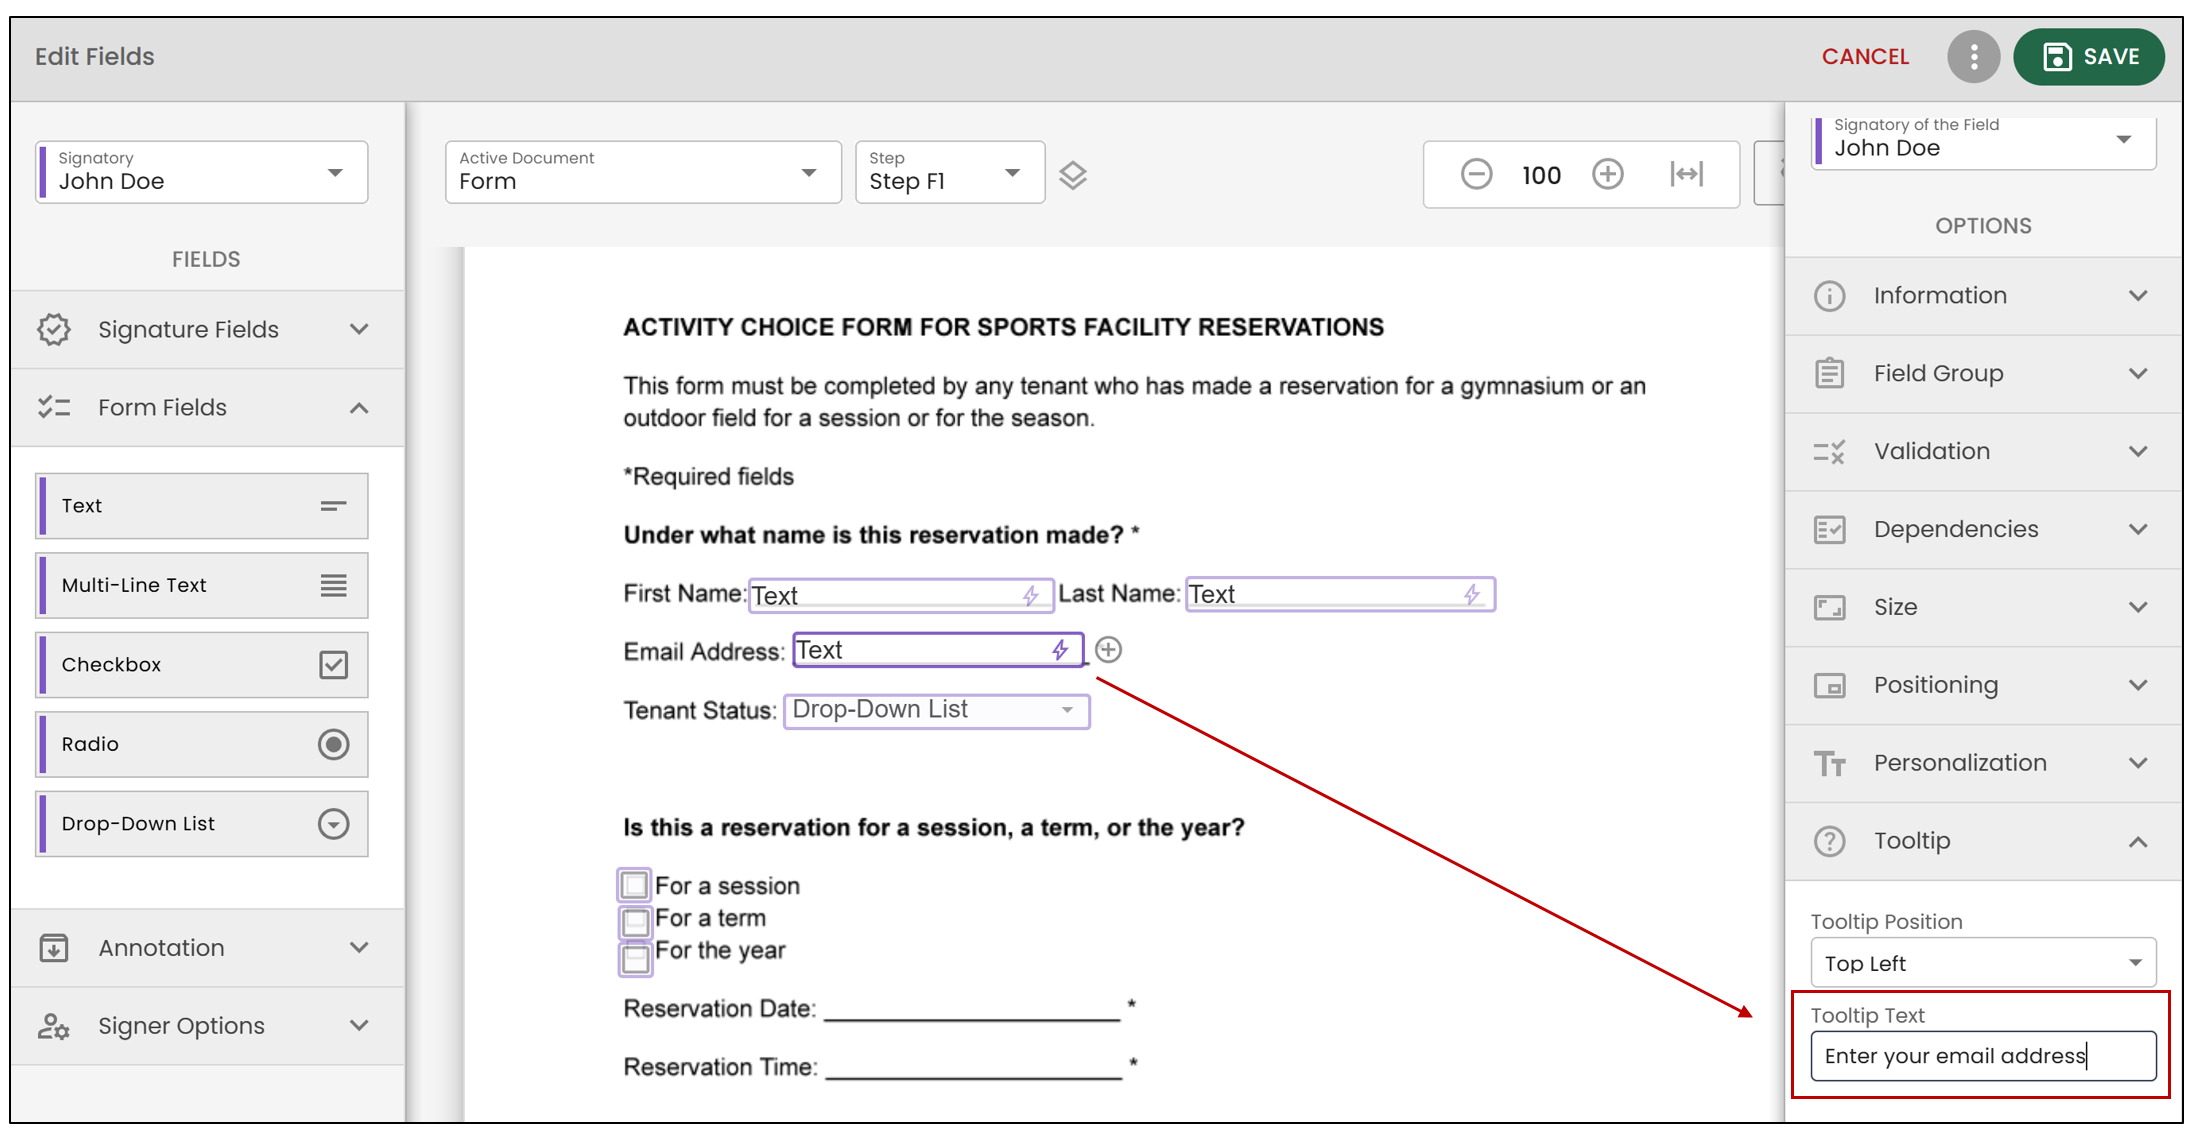
Tooltip
You can add information that will appear during the electronic signing of the document, such as instructions on how to sign. (See below)
Personalization
You can personalize the fields from the Personalization section.
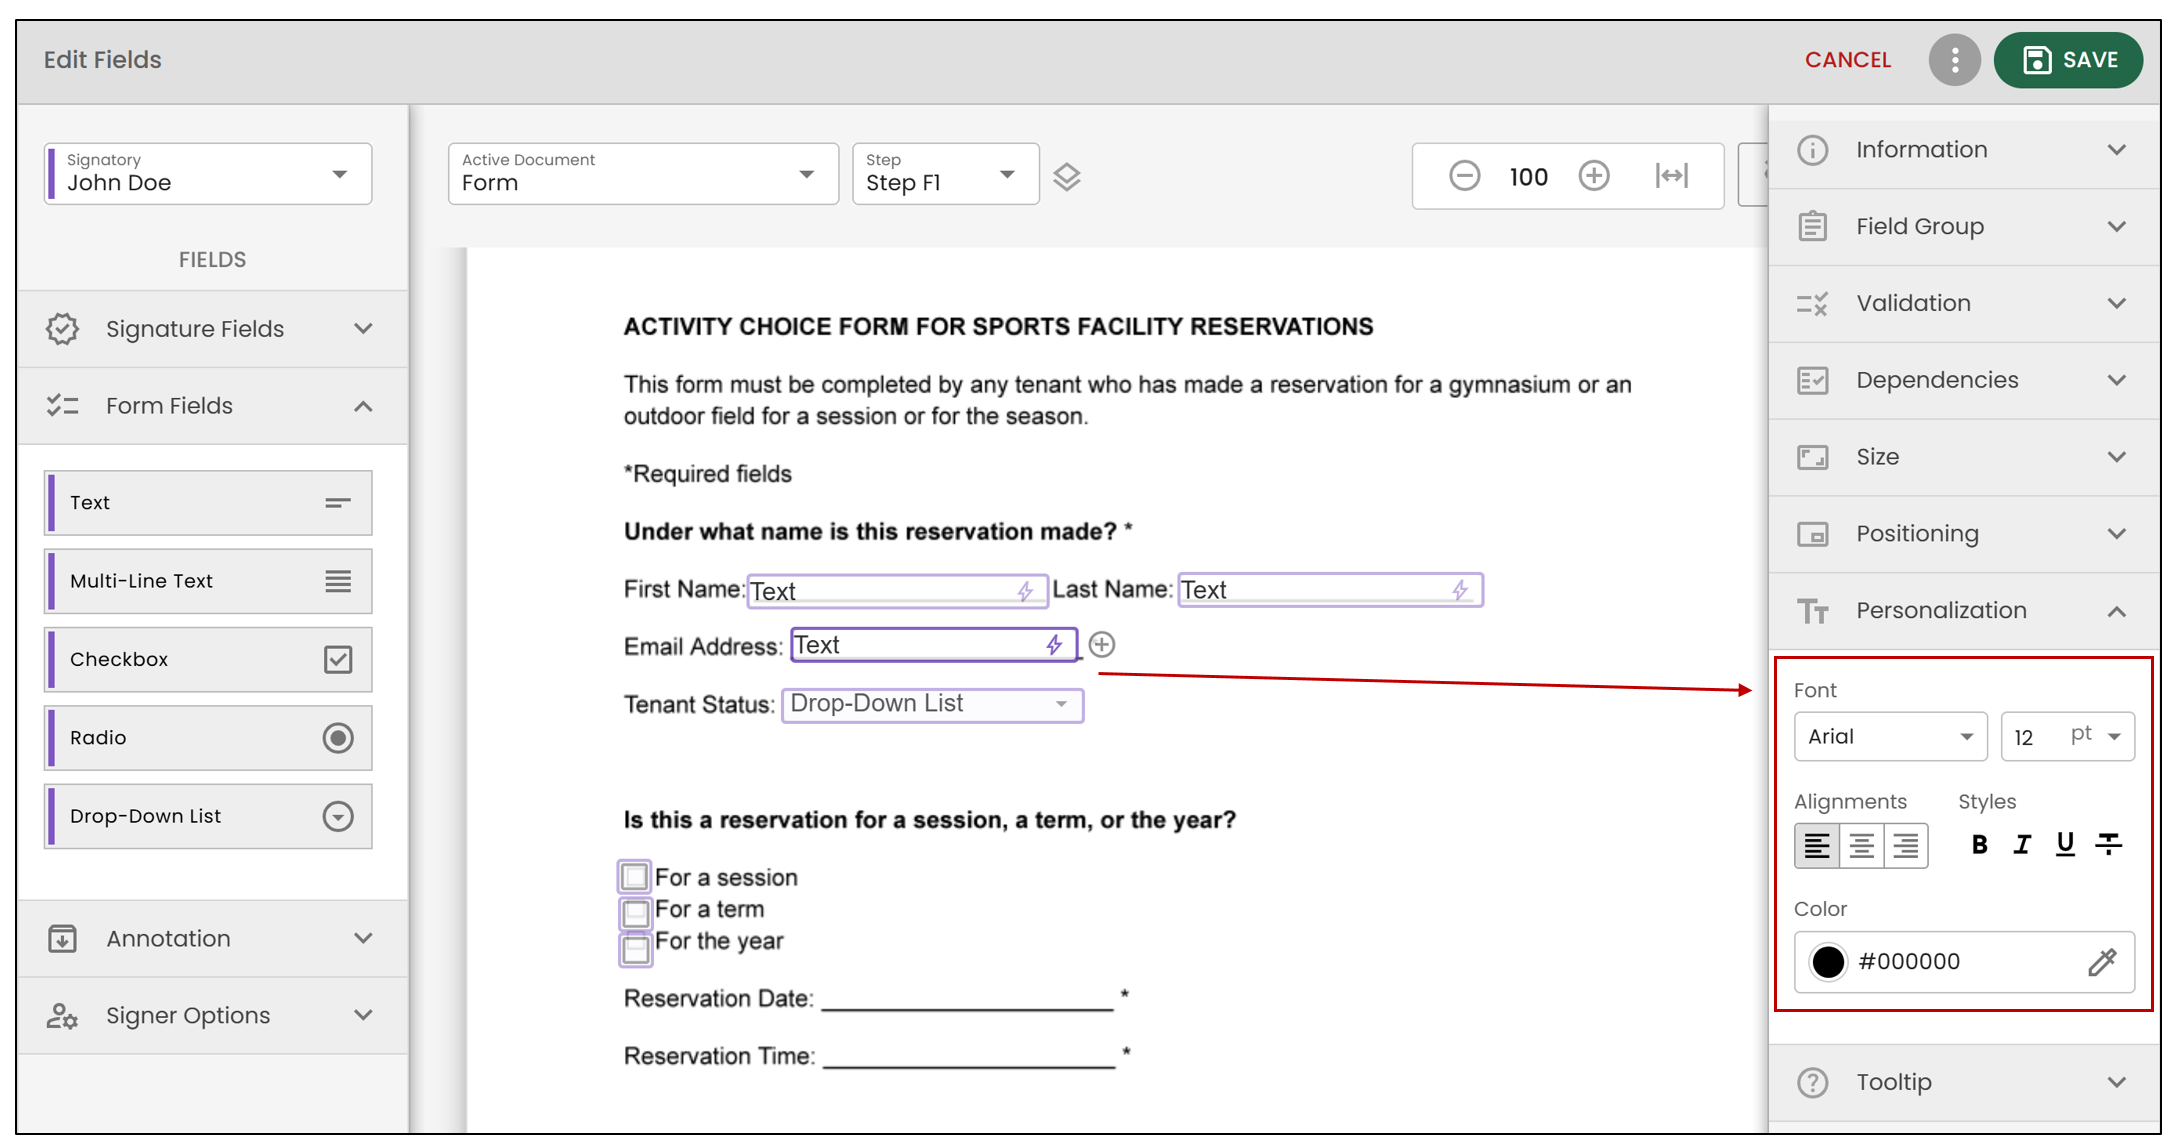
You have the option to modify the Font and size. To set a default font, please refer to the article Adding/Editing a Type of Shared Folders.
By clicking on one of the tabs under Alignments , you can adjust the alignment of a field.
You can change the font style by clicking on one of the tabs under Styles.
By clicking on the

icon, you can modify the text colour.
Text
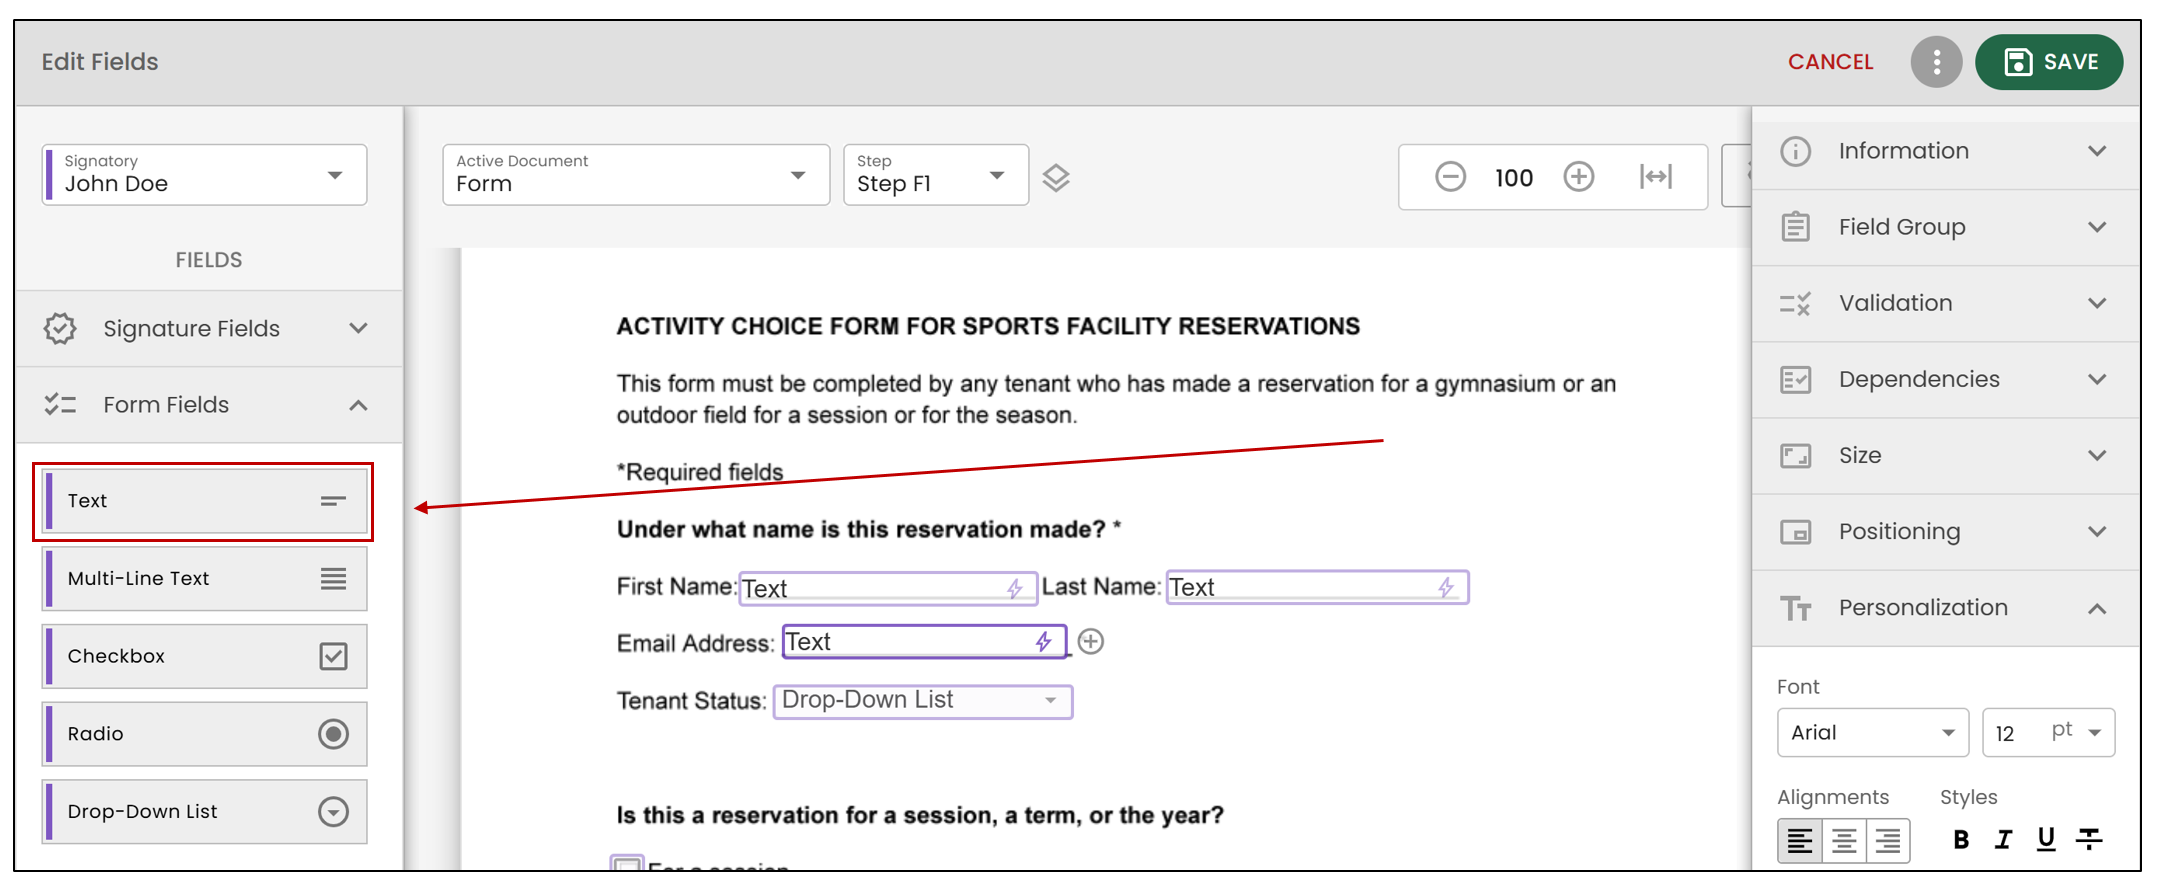
The signer will be able to enter text, but only on a single line.
You can click on the " +" to the right of the field to create a copy. This will be considered an individual field.
You can increase the width of a text line by placing your cursor on the double arrow to the right of the desired line.
You can also move a text line within the field by placing your cursor on the desired line and dragging it to the desired position. The

icon will allow you to see where the text will appear on the document once signed.
Specific Settings for this Field
- Informations
- Read-Only**😗* Add a Value entered. This field will be visible to anyone viewing the document but cannot be modified.
- Encrypted**😗* The information in this field will be protected on the servers. Anyone with access to the form will not be able to see this field’s content, as it remains confidential.
- Autofill**😗* If the signer’s information has been previously saved in their web browser, it will automatically populate the fields.
- By clicking on the

icon, you can add a shortcut. For example, if you select First Name , the signer will see their first name automatically appear in the field during signing. *
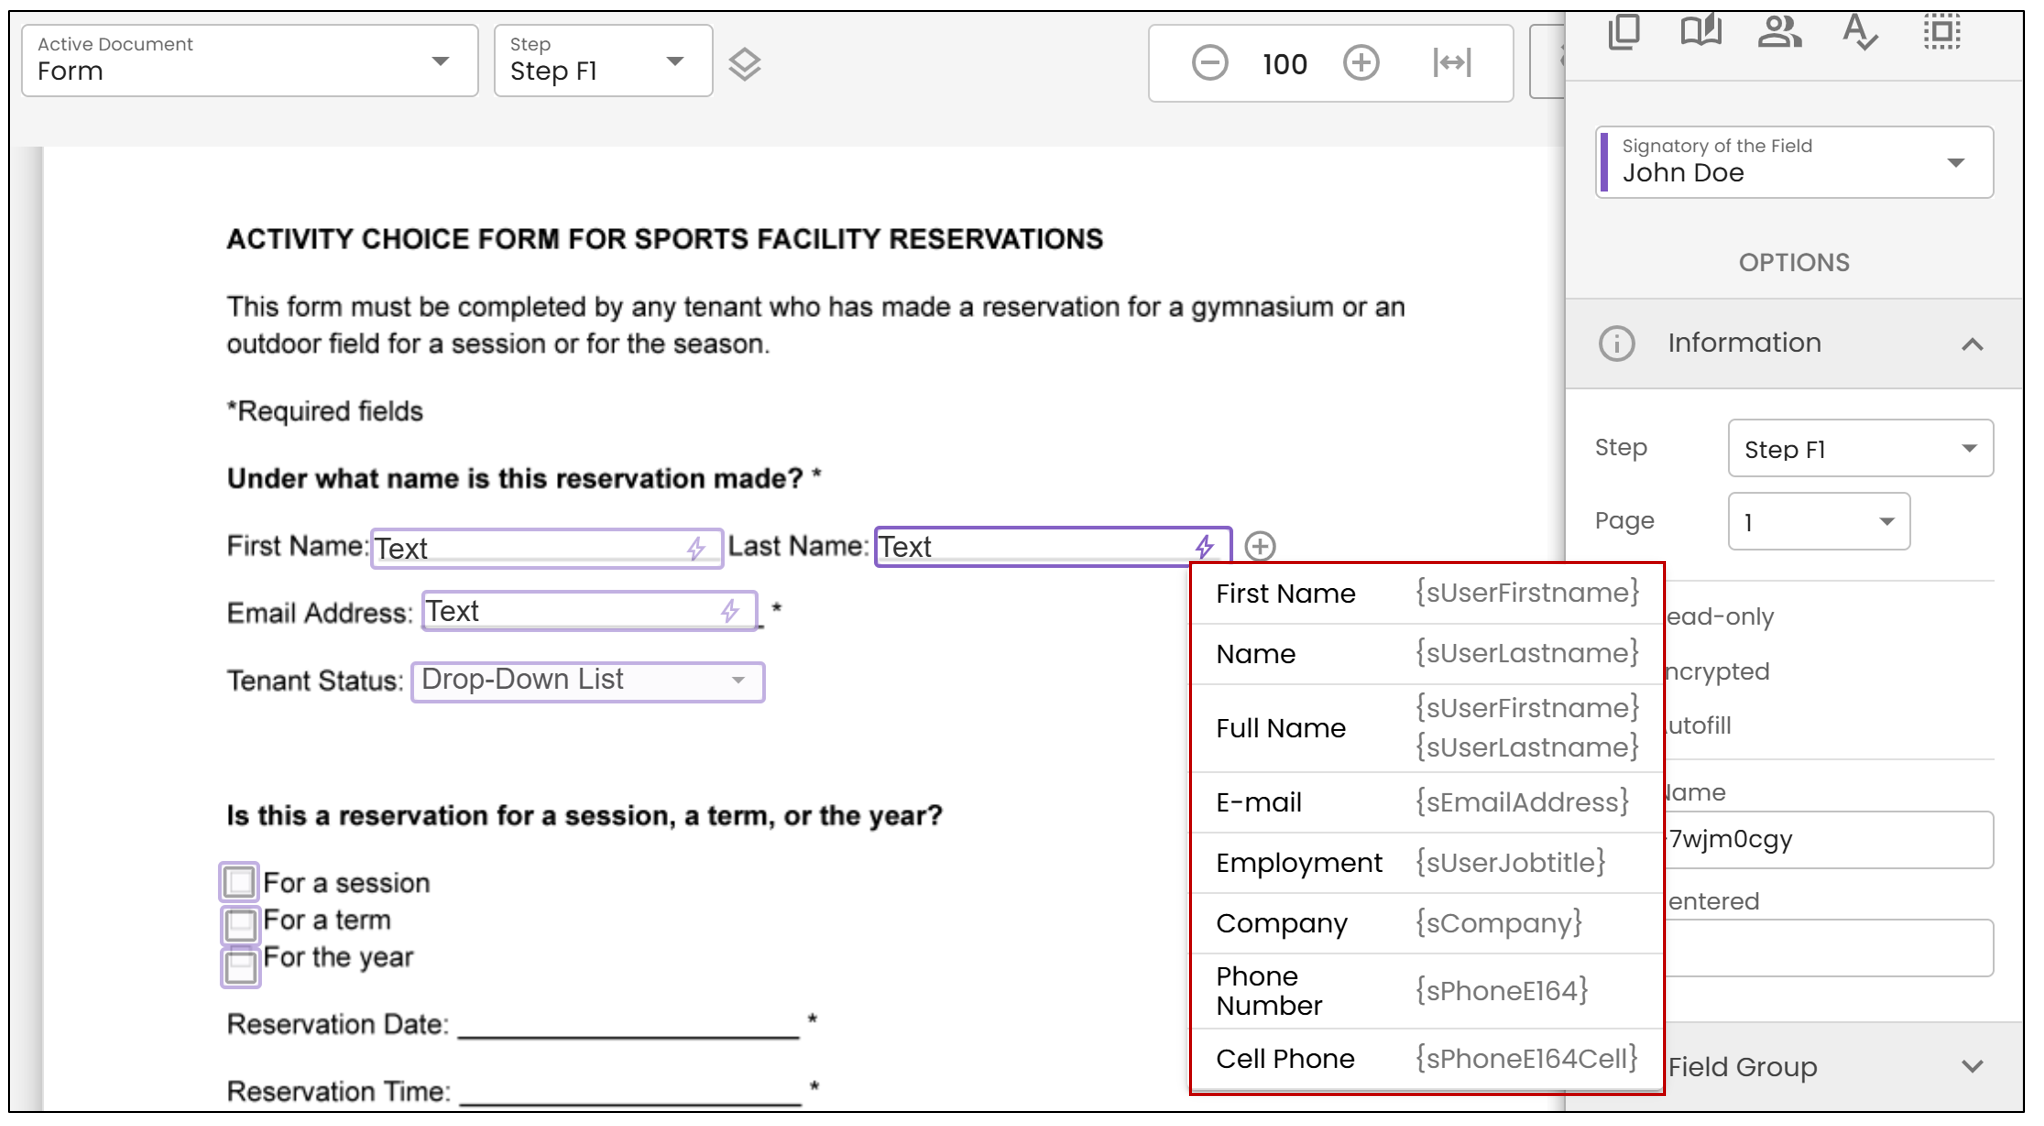
* **Value entered****:** Allows you to insert text that will be set as the default value for this field only.
- Field Group :
- A field group consists of fields that share the same properties (type, attributes, formatting rules, validation) and can be used for complex tests and dependencies (e.g., requiring a minimum of 3 and a maximum of 5 fields to be completed). See the Field Group section of this article for more details.
- Validation :
Required Field**😗* Allows you to designate a field that must be completed during signing.
Format**😗* You can select a required format. For example, if you choose a specific date format, a calendar will appear during signing.
Character Limit**😗* Enter the maximum number of characters that can be entered during the electronic signing of the document.
Here’s what the signer will see when filling out the form field:
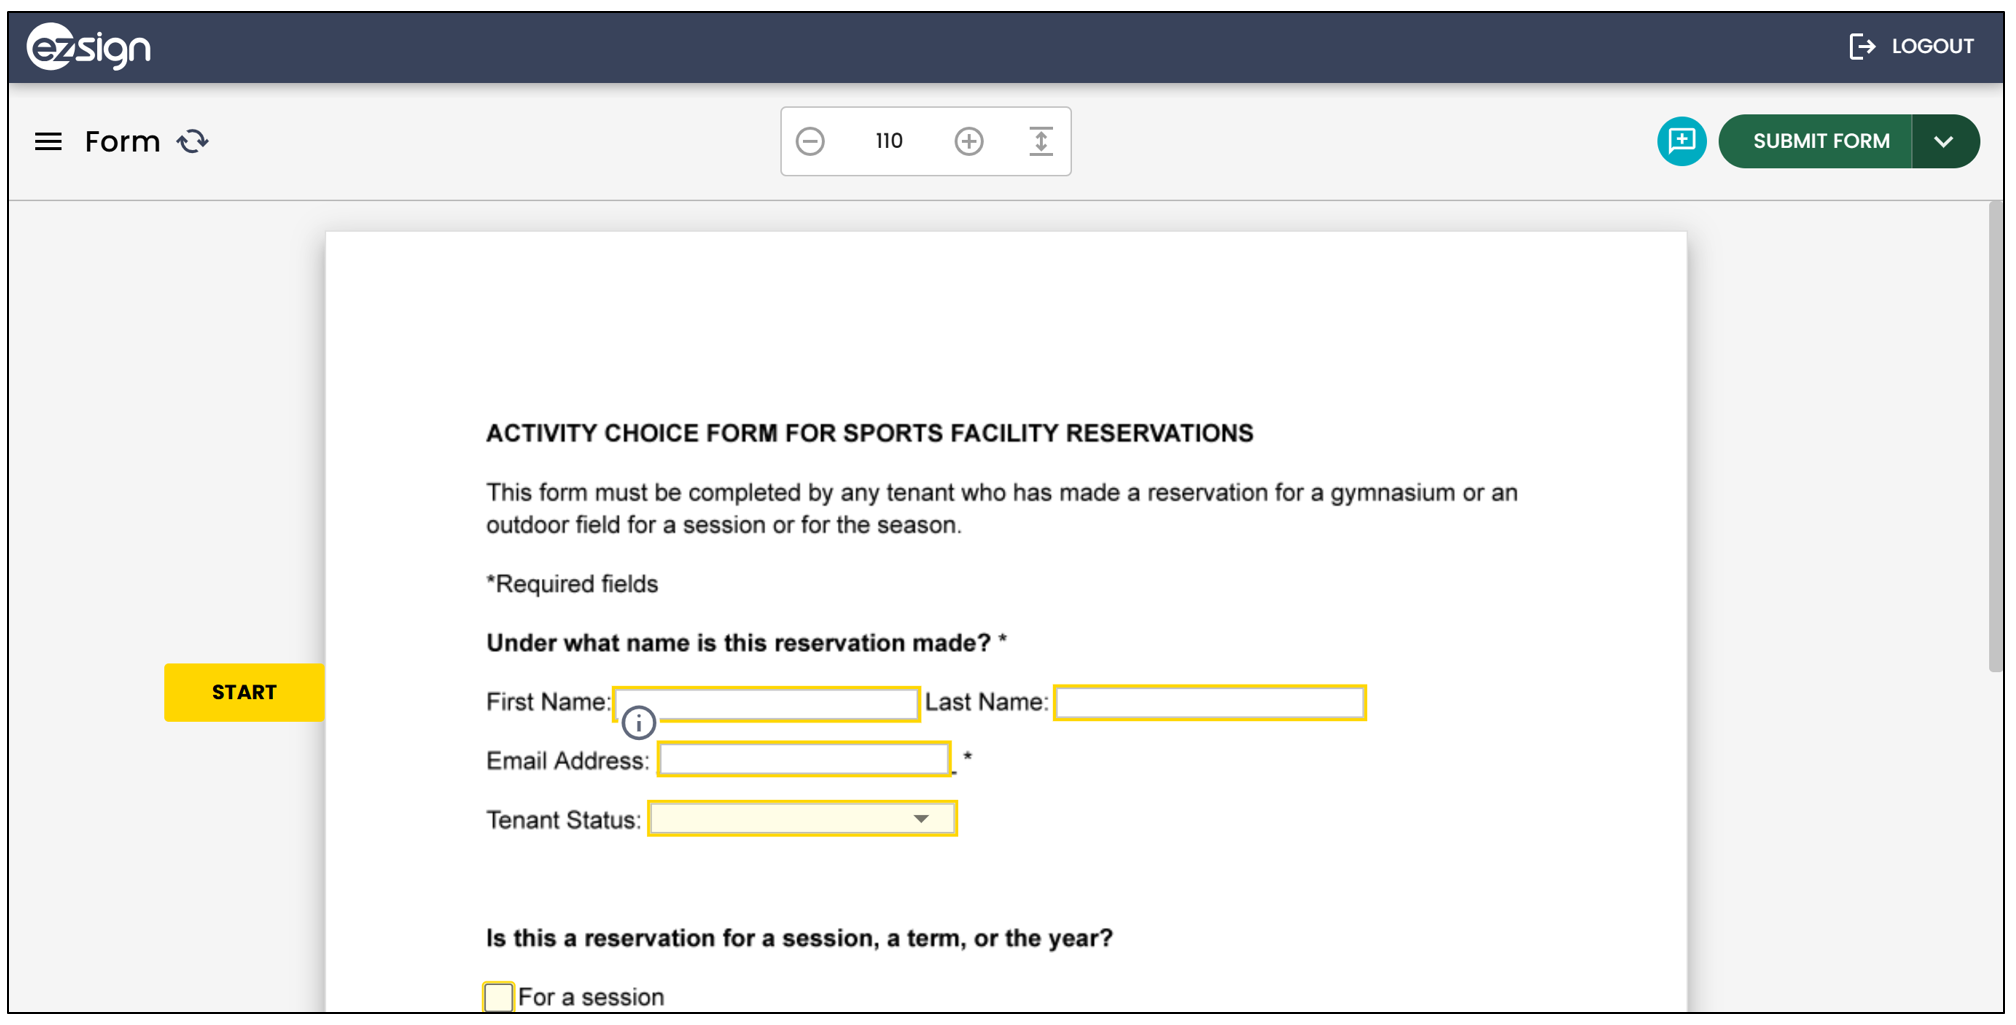
NOTE: The

icon appears on the document because of the use of the Tooltip in the form.
Multi-Line Text
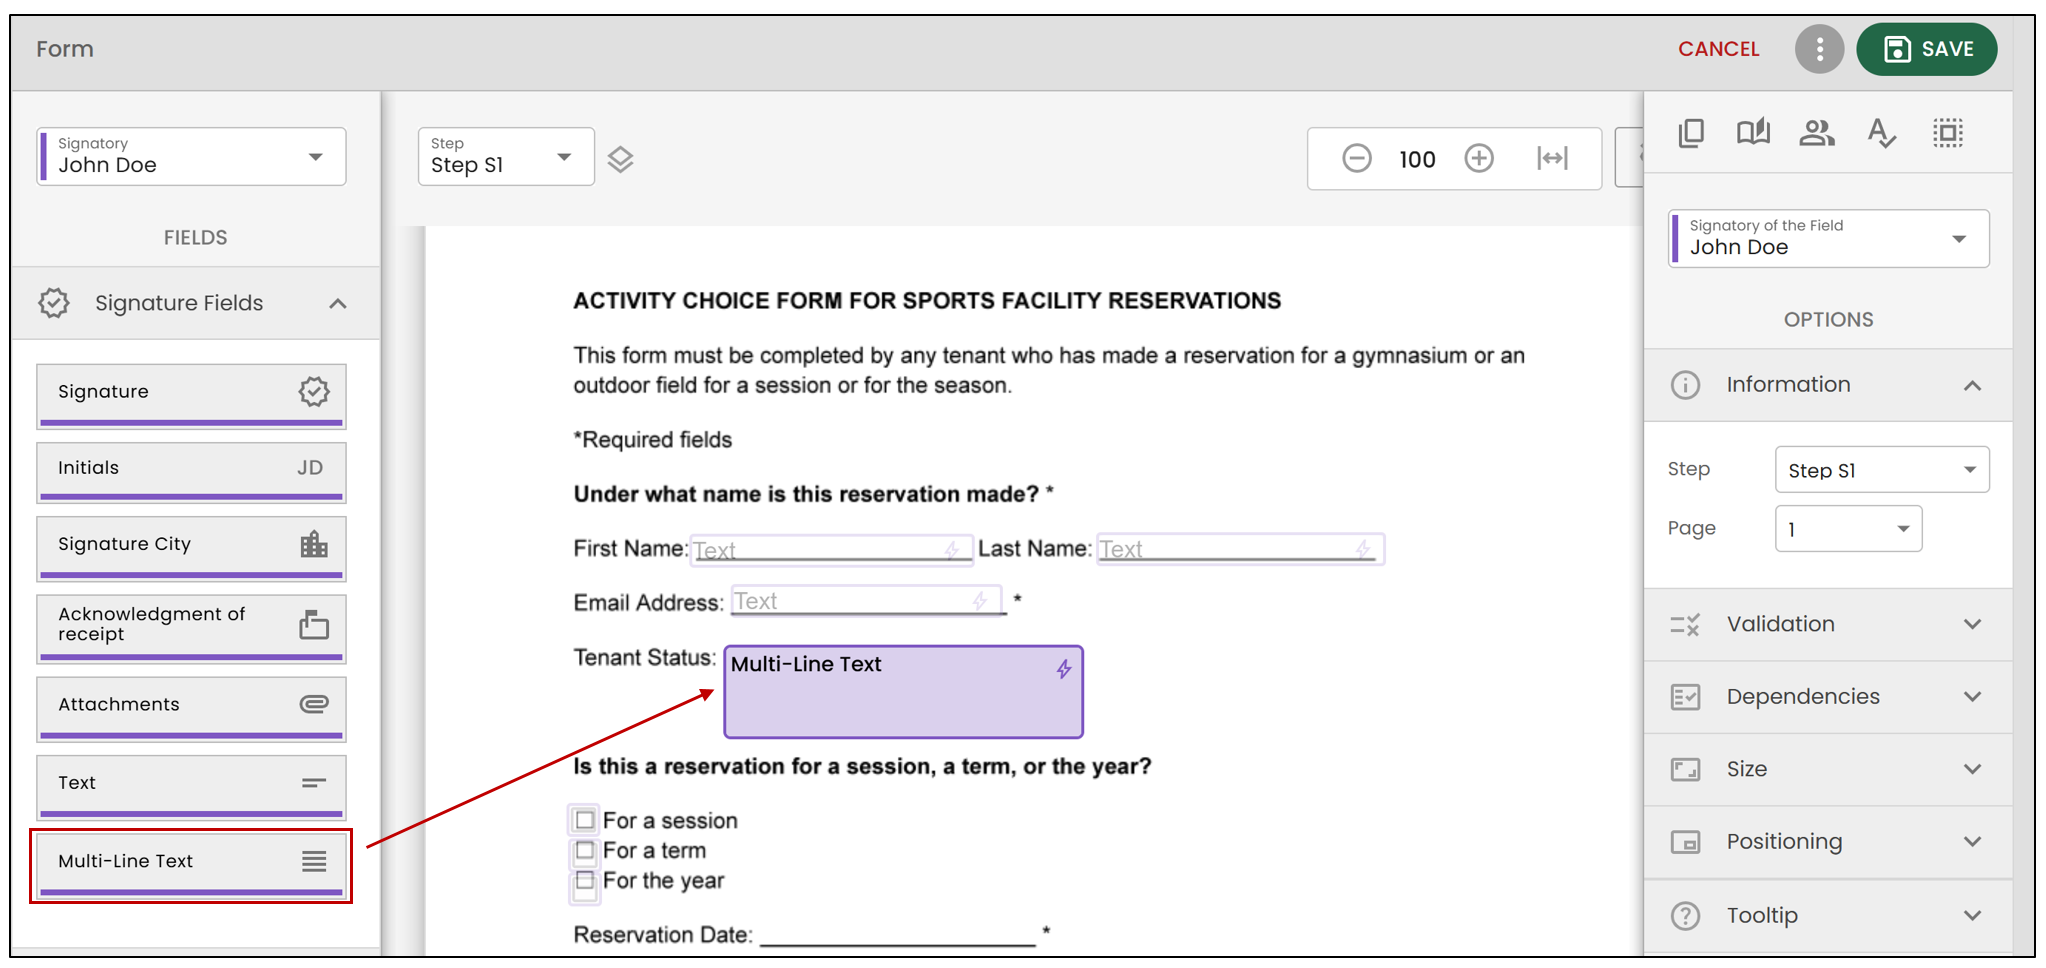
The signer will be able to enter text on multiple lines.
By placing your cursor on the bottom-right corner of the field, you can adjust its width and height.
Specific Settings for this Field
- Informations
- Read-Only**😗* Add a Value entered. This field will be visible to anyone viewing the document but cannot be modified.
- Encrypted**😗* The information in this field will be protected on the servers. Anyone with access to the form will not be able to see this field’s content, as it remains confidential.
- Autofill**😗* If the signer’s information has been previously saved in their web browser, it will automatically populate the fields.
- By clicking on the
icon, you can add a shortcut. For example, if you select First Name , the signer will see their first name automatically appear in the field during signing. *
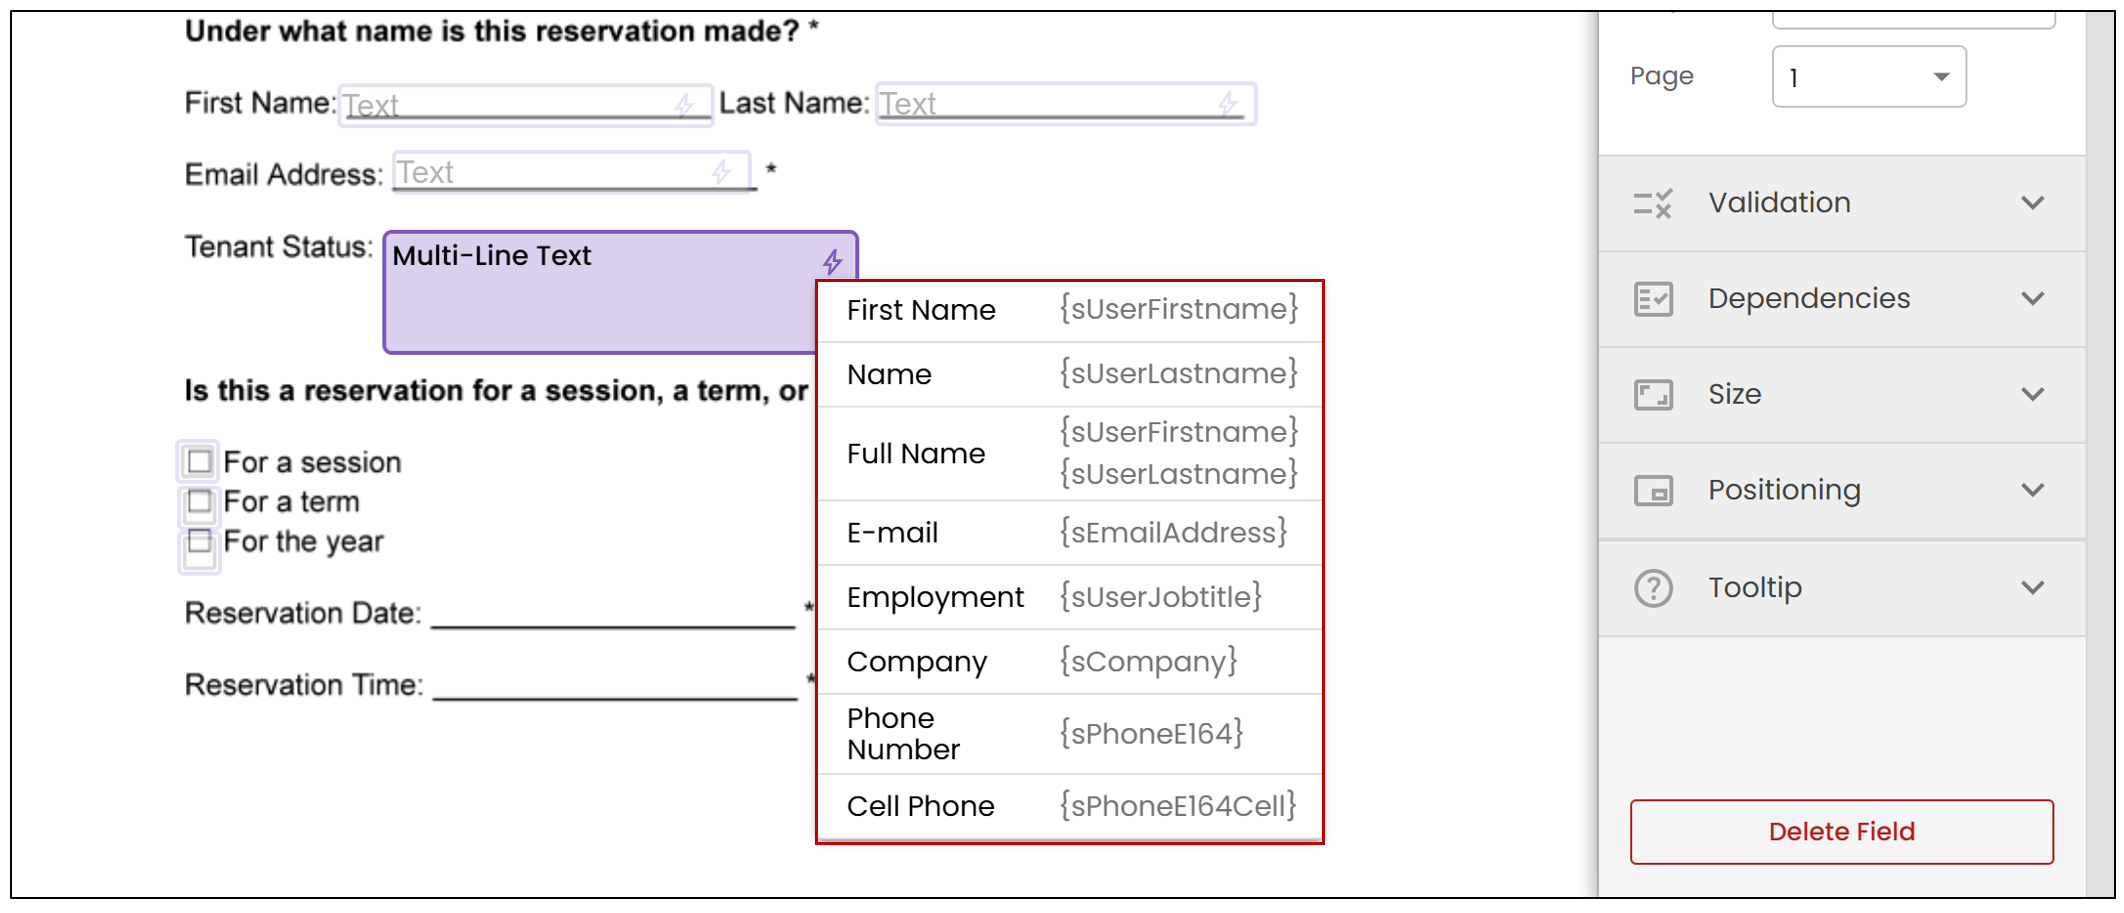
* **Value entered****:** Allows you to insert text that will be set as the default value for this field only.
Field Group :
- A field group consists of fields that share the same properties (type, attributes, formatting rules, validation) and can be used for complex tests and dependencies (e.g., requiring a minimum of 3 and a maximum of 5 fields to be completed). See the Field Group section of this article for more details.
Validation :
Required Field**😗* Allows you to designate a field that must be completed during signing.
Character Limit**😗* Enter the maximum number of characters that can be entered during the electronic signing of the document.
Dimensions :
Width : Allows you to adjust the width of the field.
Height : Allows you to adjust the height of the field.
Checkbox
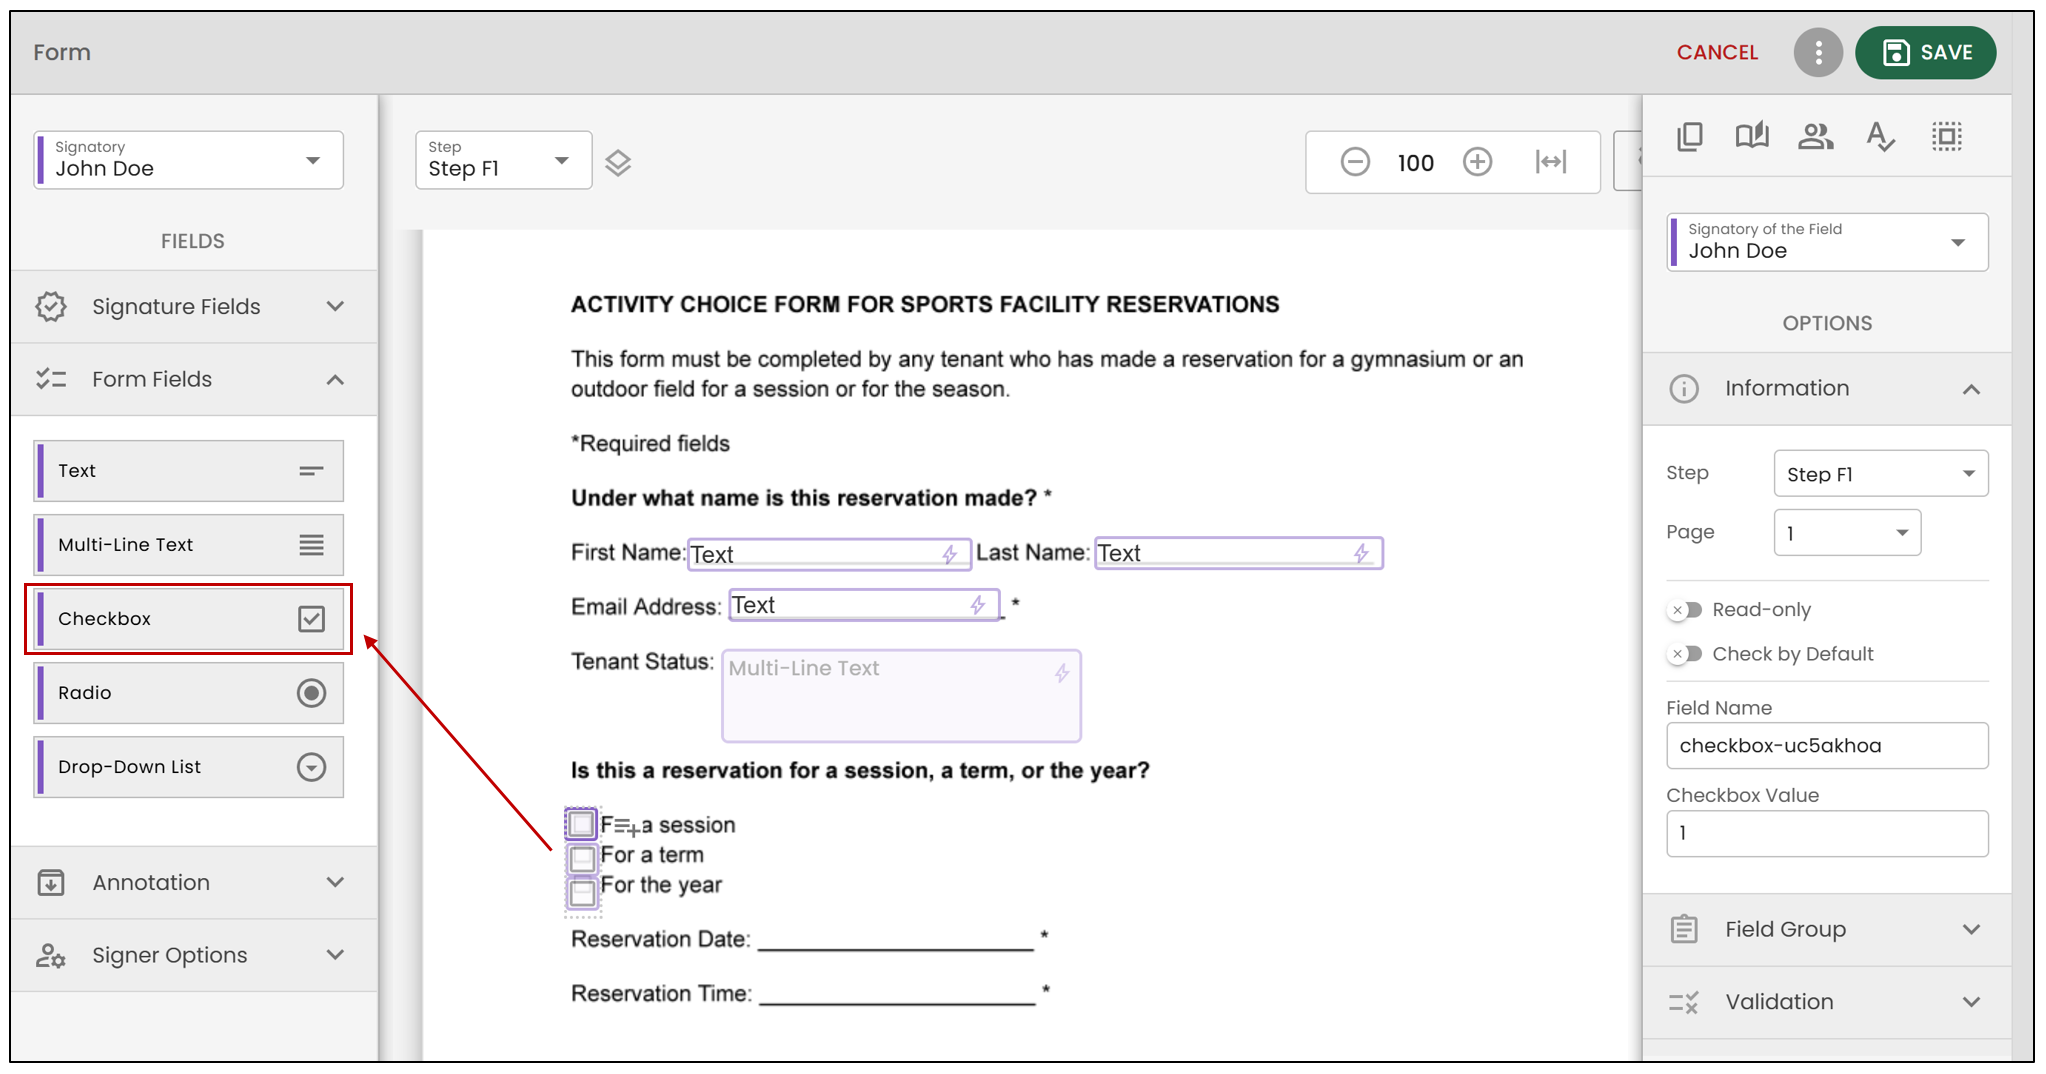
- When a checkbox is added, it is automatically included in a field group. Click on the

icon to add a checkbox to the same field group.
- You can move a checkbox within the field group by placing your cursor on the desired checkbox and dragging it to the desired position.
Specific Settings for this Field
Informations :
Check by Default : The selected box will be checked by default during signing.
Read-only : This field will be visible to everyone viewing the document, but they won’t be able to modify it.
Checkbox value : The entered number corresponds to the box that will be checked by default.
Field Group :
- A field group consists of fields that share the same properties (type, attributes, formatting rules, validation) and can be used for complex tests and dependencies (e.g., a minimum of 3 and a maximum of 5 must be completed). See the Field Group section of this article for more details.
Validation :
- Number of Boxes to Check : Enter "1" in the minimum field if you want this checkbox to be required during the electronic signing of the document. Otherwise, leave it as "0." Enter the maximum number of checkboxes that can be selected during the electronic signing of the document.
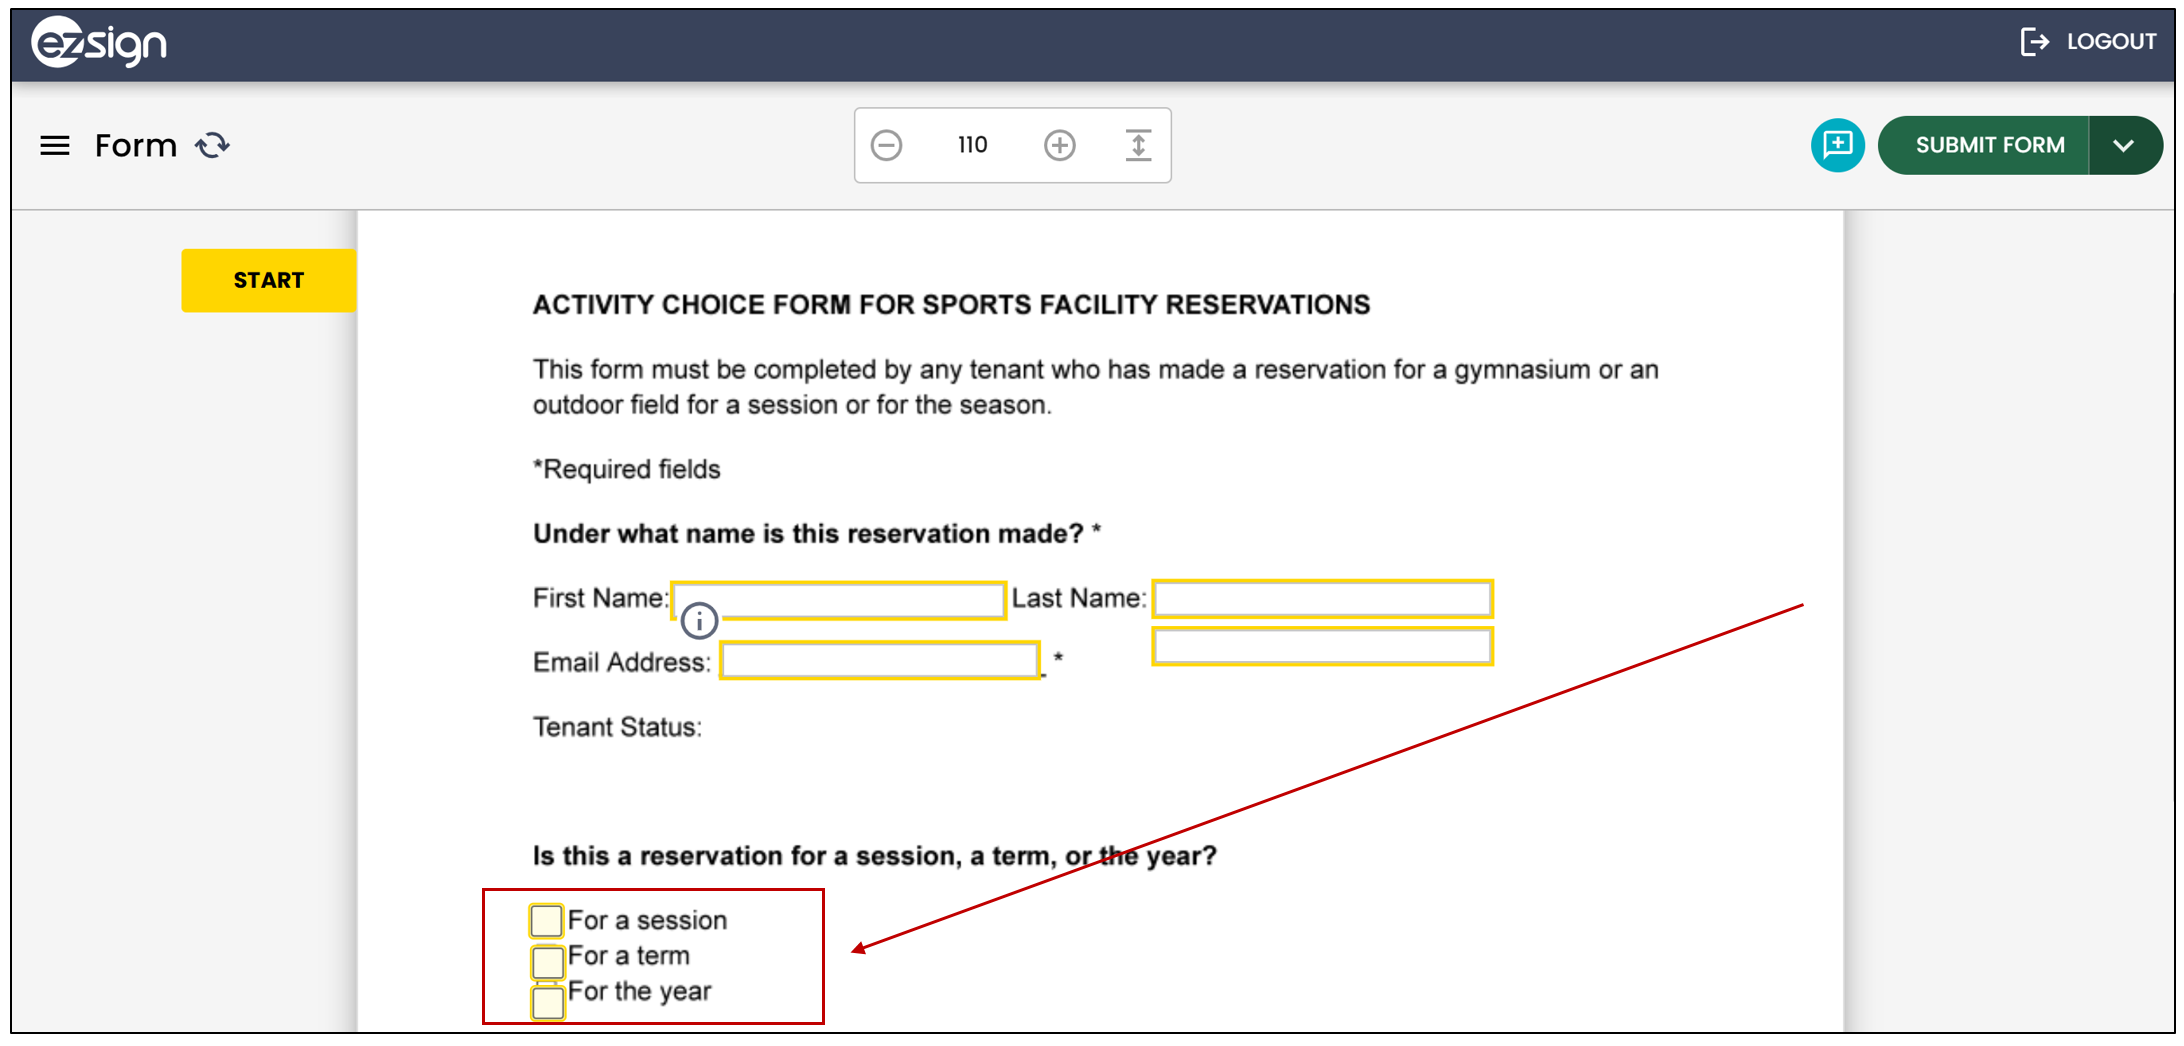
Here is what the signer will see when filling out the checkboxes:
Radio Buttons
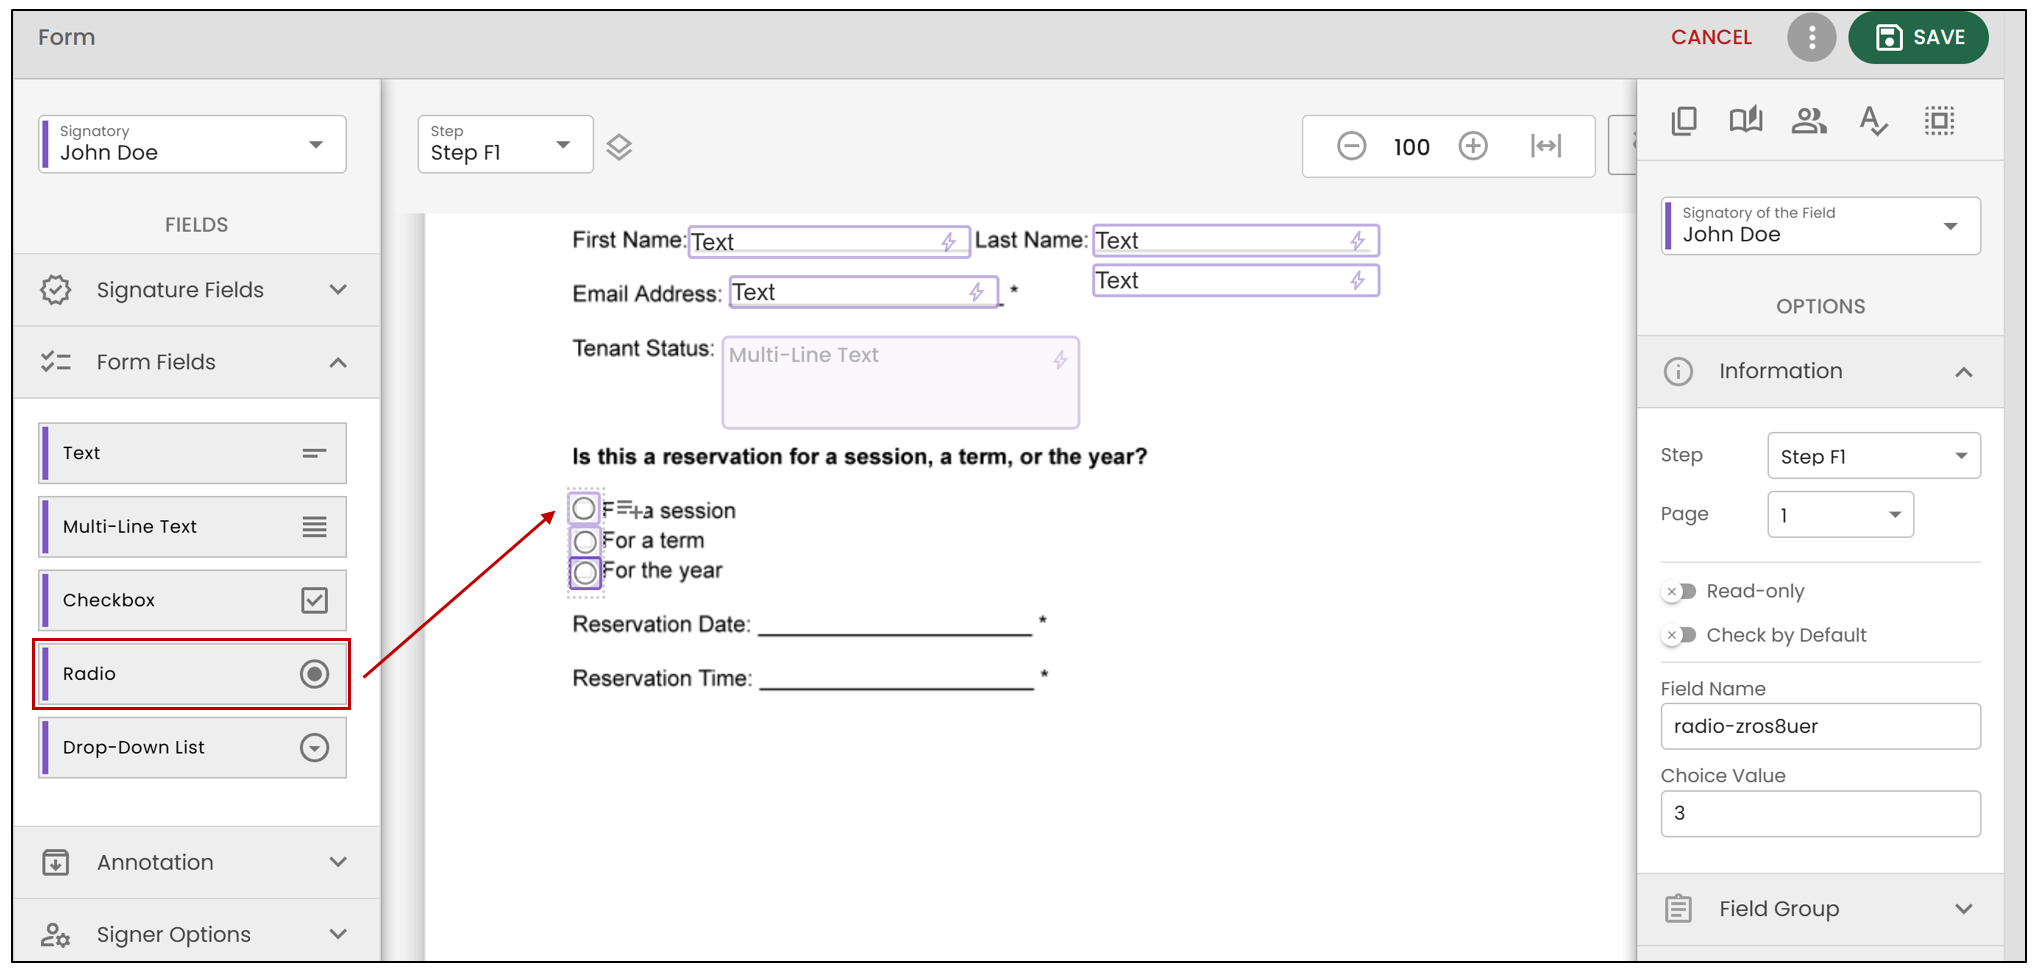
- When a radio button is added, it is automatically included in a field group. Click on the

icon to add a radio button to the same field group.
- You can move a radio button within a field group by placing your cursor on the desired button and dragging it to the desired position.
NOTE: A radio button allows the signer to select only one option. If you want to allow the selection of more than one option, please use checkboxes instead.
Specific Settings for this Field
Informations :
Check by Default : The selected box will be checked by default during signing.
Read-only : This field will be visible to everyone viewing the document, but they won’t be able to modify it.
Checkbox value : The entered number corresponds to the box that will be checked by default.
Field Group :
- A field group consists of fields that share the same properties (type, attributes, formatting rules, validation) and can be used for complex tests and dependencies (e.g., a minimum of 3 and a maximum of 5 must be completed). See the Field Group section of this article for more details.
Validation :
- Mandatory field : The radio button must be selected during signing.
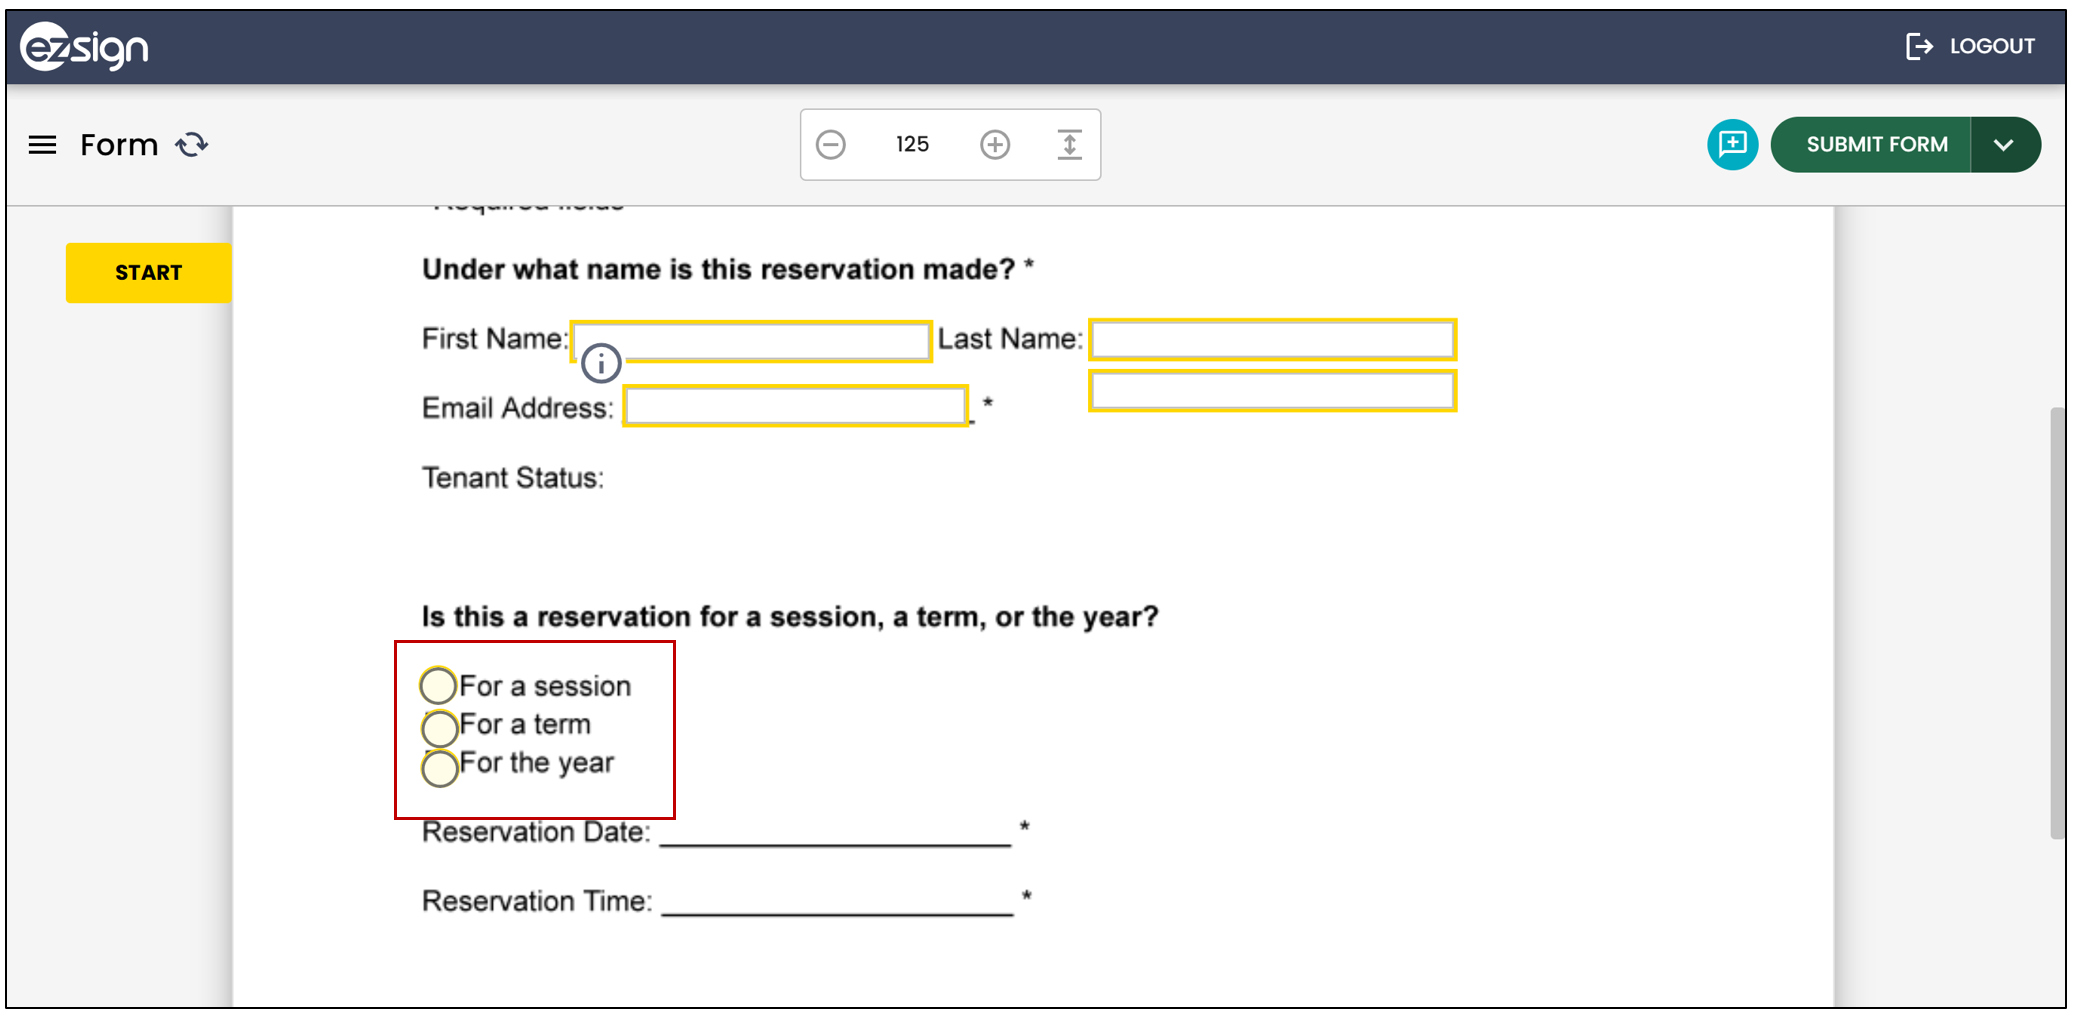
Here is what the signer will see when selecting the radio buttons:
Drop-Down List
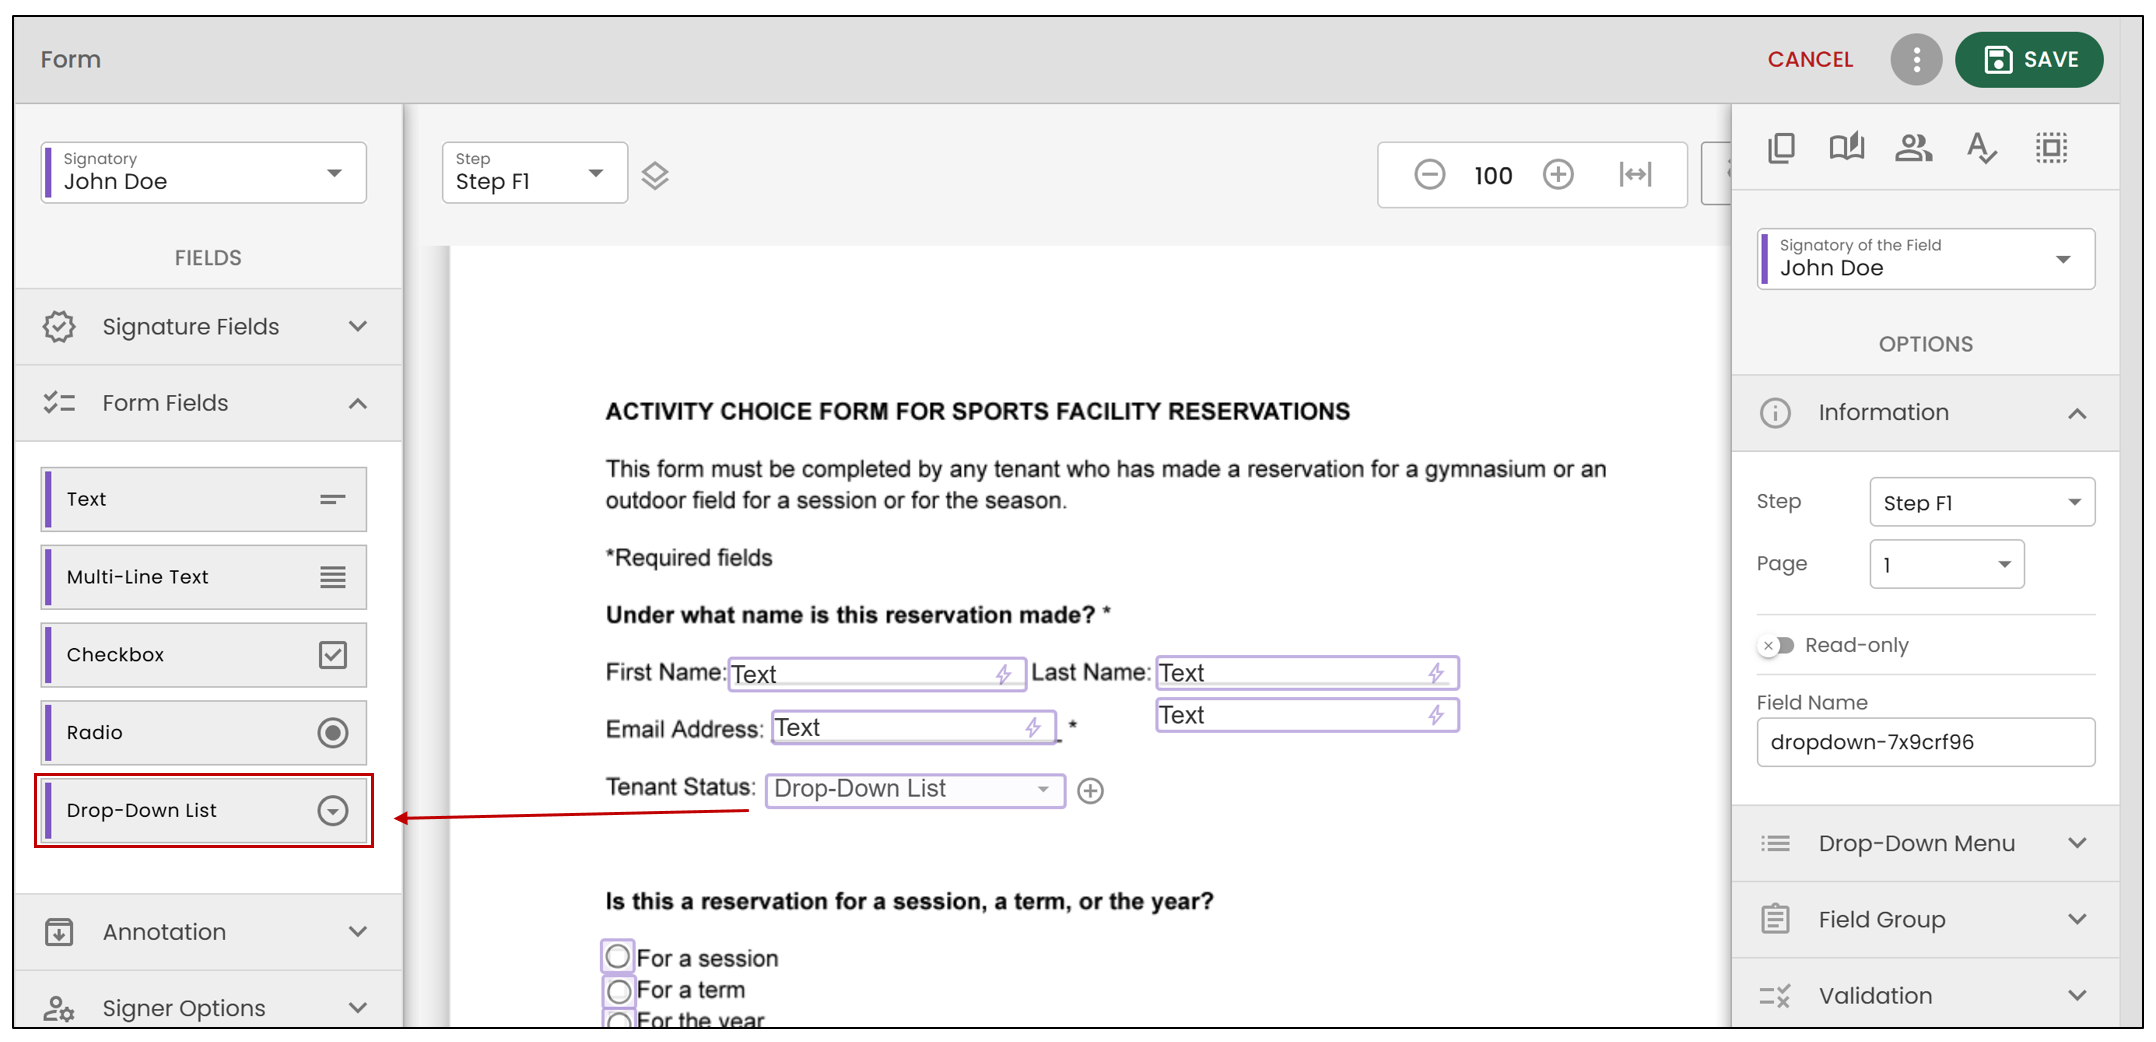
- The signer must select an option from the drop-down list.
Specific Settings for this Field
Informations :
- Read-only : This field will be visible to everyone viewing the document, but they won’t be able to modify it.
Dropdown Menu :
- List of Options : The signer must choose from the listed options.
- Default Value : The selected option will automatically be visible to the signer
Field Group :
- A field group consists of fields that share the same properties (type, attributes, formatting rules, validation) and can be used for complex tests and dependencies (e.g., a minimum of 3 and a maximum of 5 must be completed). See the Field Group section of this article for more details.
Validation :
- Mandatory field : The drop-down list must be completed during signing.
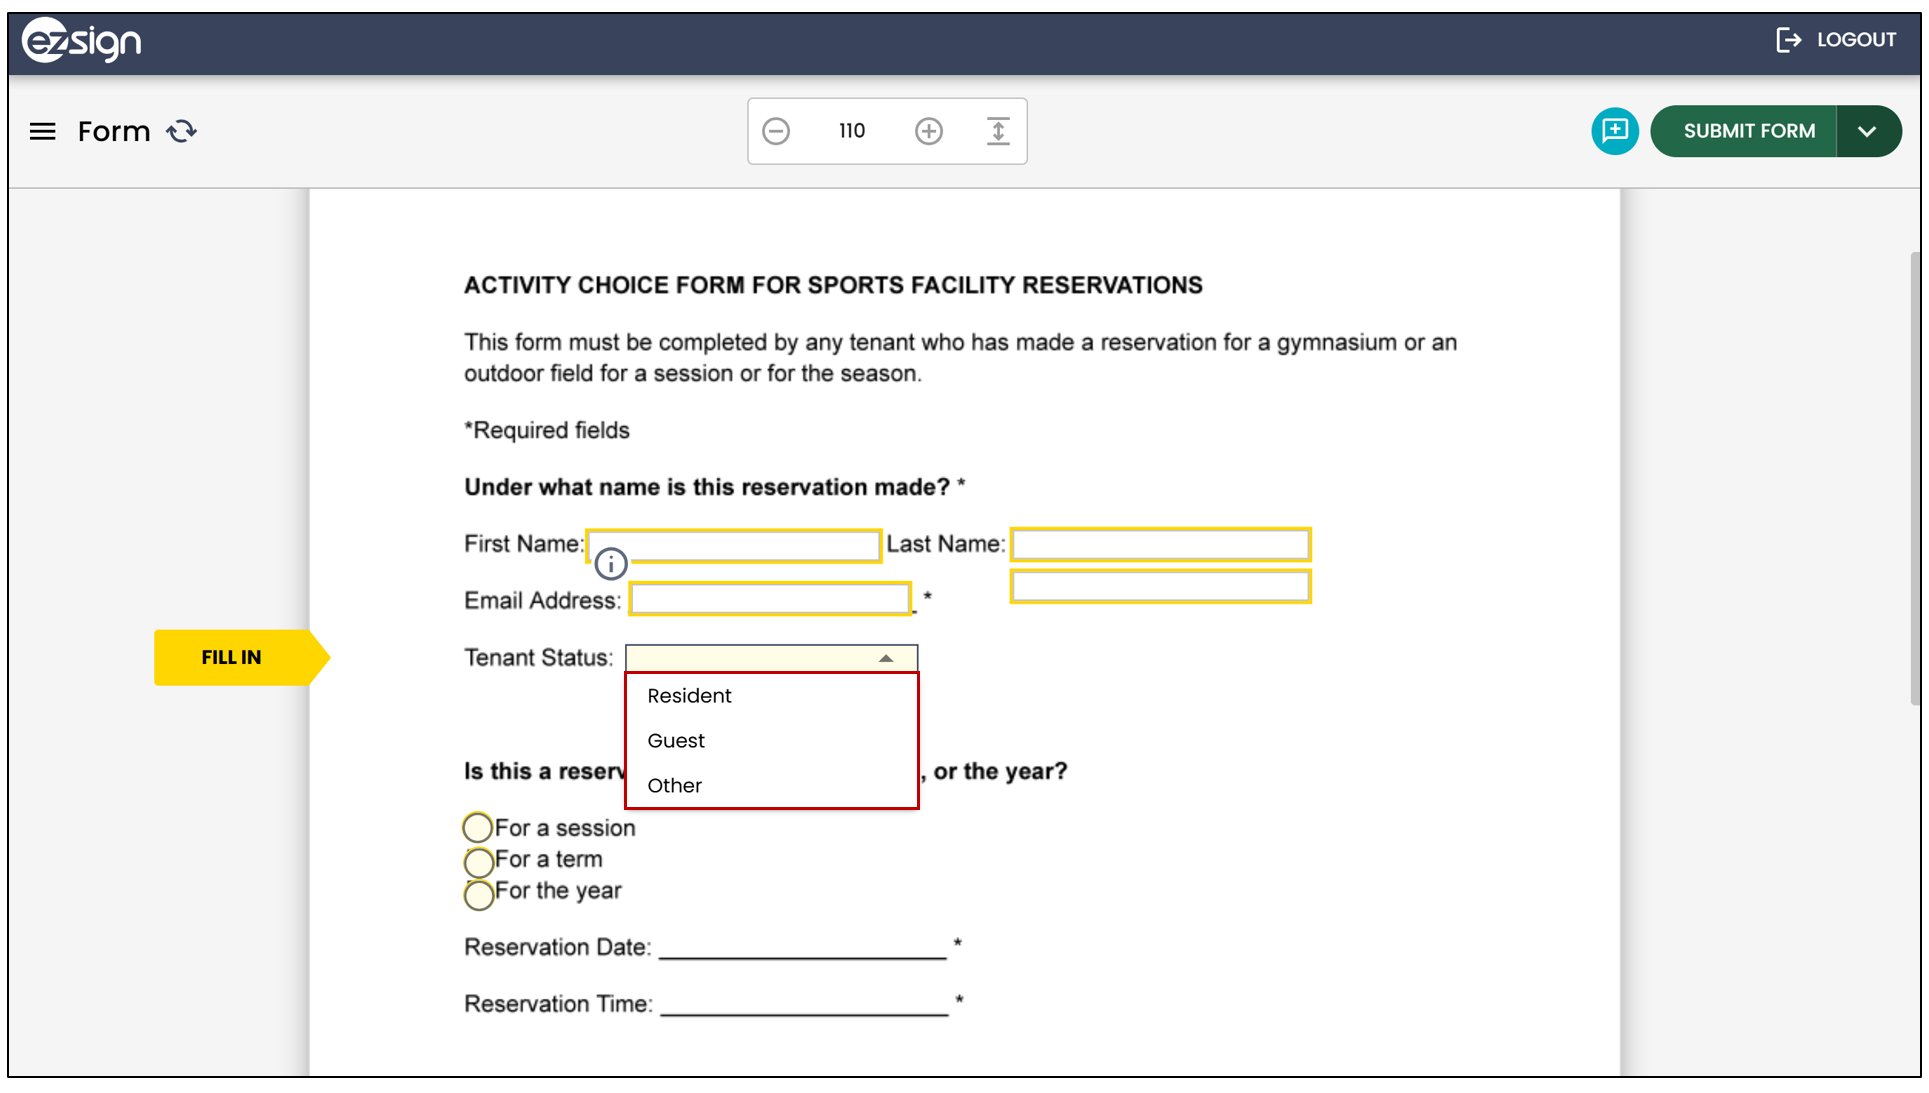
Here is what the signer will see when selecting from the drop-down list: